Axpert 11
TStructs (Forms)
- Create Form
- Create DC
- Create Fields
- Grid DC/frames
- Formulae in fields
- SQL in fields
- Drop down fields
- Autogenerate fields
- Table fields
- File upload fields in forms
- Photos &Image fields
- Barcode /QR Code Scanner
- Fill Grid
- Posting data – Gen maps
- Updating fields in DB tables – MD Map
- Toolbars in tstructs
- Tracking changes/Audit trial
- Try it yourself
IViews
Scripts
Axpert Jobs
Axpert Cards
HTML Plug-ins
Users & Roles
- Users, roles & responsibilities
- Responsibilities
- User Role
- User Login
- SSO Authentication
- Stay Sign In
Workflow
Axpert API
Application Var/Params
Publish Axpert Apps
Axpert Mobile
Settings
- Axpert installation
- Change password
- Forgot Password
- Developer Options
- Global Settings
- In-Memory DB
- Notifications for Long Running Webservice’s
- Axpert Configuration on web
- Axpert Licensing
Utilities
Customization
- Main Page Customization
- Home Page Customization
- More API
- Custom User Interface
For Reports - Custom HTML In Forms
- CSS And JS Customization
- Developer Notes
- Hooks In Forms
- Third Party SSO Integration
WebServices
Axfast
Axpert Configuration on web
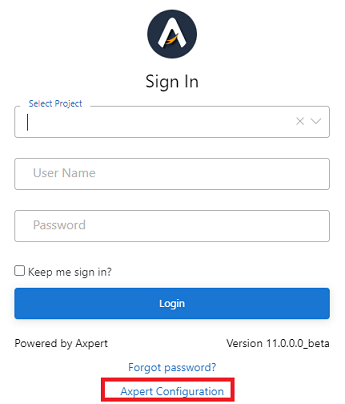
If a new site is being set up and has no Axpert license the configuration option is shown. To configure Axpert on the web, go to the run site of the designated server and find the Sign-in option.
Click on Axpert Configuration option.
Security Authentication
“EnableAxpertConfiguration” web.config key should be set to “true” in order to access the Axpert configuration page
Example: <add key=”EnableAxpertConfiguration” value=”true”/>
Add user list in “ConfigAuthentication.ini” file in JSON format, containing authenticating user list to access Axpert Configuration page. “ConfigAuthentication.ini” file is available in “Axpert Web” root directory.
Example JSON:
[{“uname”:”admin”,”pwd”:”agile”}]
[{“uname”:”admin”,”pwd”:”agile”},{“uname”:”user1″,”pwd”:”12345″}]
Click on Axpert Configuration, enter valid credentials to configure Axpert, and click on Authenticate to proceed.

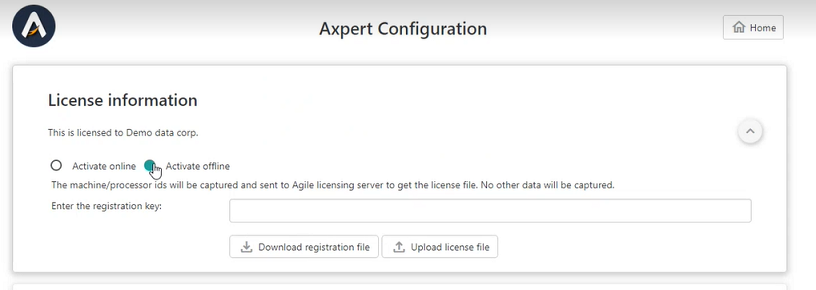
The Axpert configuration page opens up. There are two types of license activation options available as shown below.
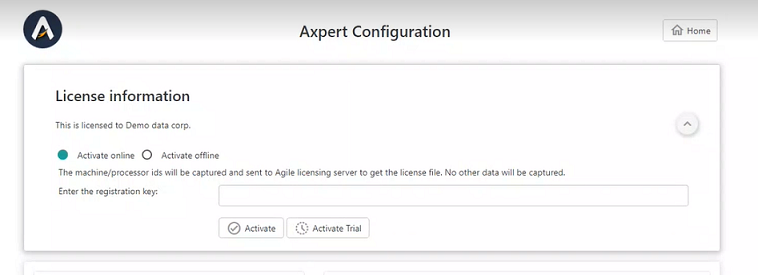
Activate Online
If you want to activate your license online, then click on the radio button next to it.
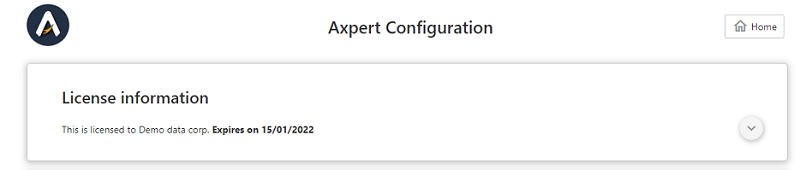
Enter the registration key in the text box and click on activate. On successful activation, License information will be displayed as shown.
Activate Offline
If you want to activate your license offline then choose the “Activate offline” option on the screen.
Enter the registration key in the box and download the registration file. The downloaded .reg file has to be sent to the licensing team for
activation requests.
In return, the licensing team will provide you with a configured license file. This file has to be uploaded to the site using the “Upload
license file” option.
Once the file is uploaded, the license will be activated and related license information will appear on the screen.
Once the license activation is successful the database connection and demo will be enabled.
Testing database connection while creating new connection
Create a new DB connection by clicking on the ‘+’ button on-screen, providing the required credentials.
Click on Test Connection.
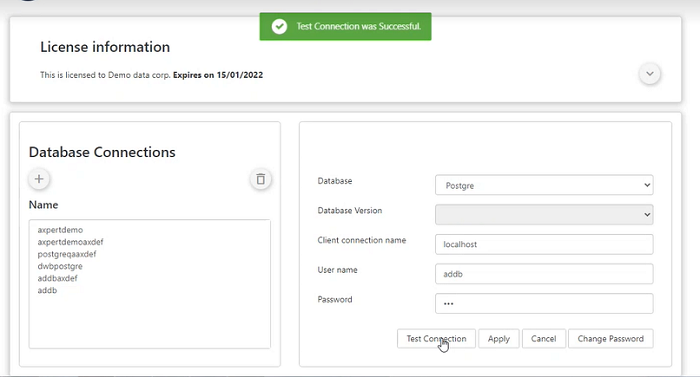
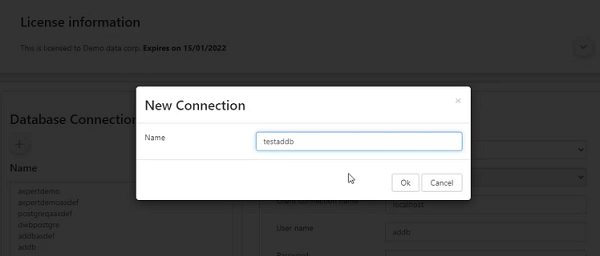
If the test connection is successful, click on apply. Enter a new connection name and click on OK.
Find the new connection in the DB connections list.
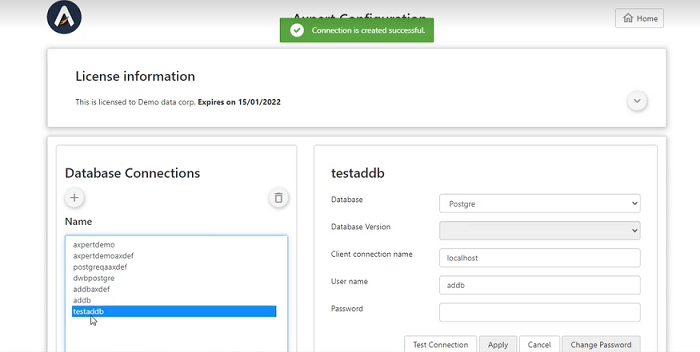
Try logging into the developer site to confirm successful creation.
DB Password Change
Click on Change password and enter the new password.
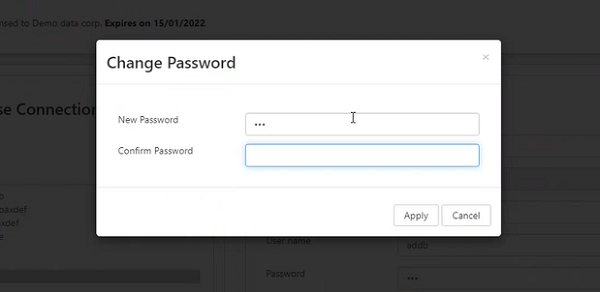
Click on Apply to change the existing password and wait for the “Password changed successfully” message.
Try connecting to the DB by entering a new password to ensure the change.
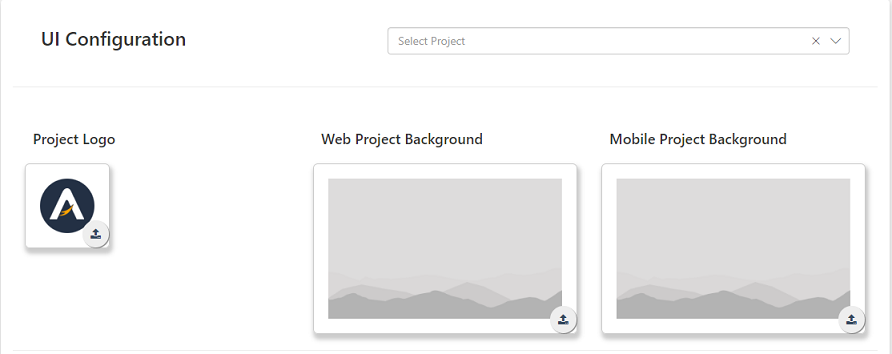
UI Configuration
This section allows you to set your project UI.
Select your project from the drop-down
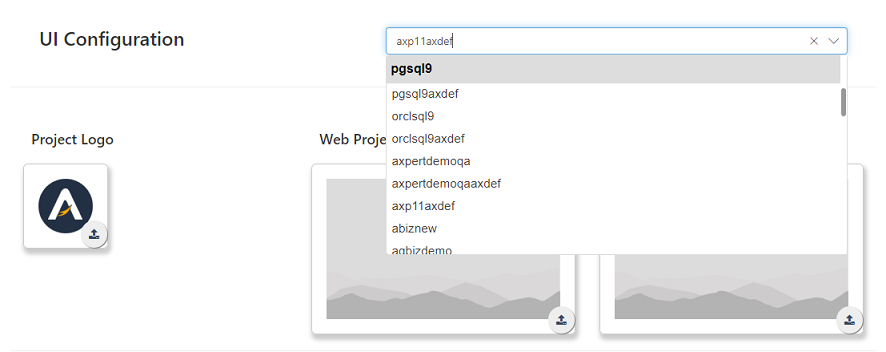
Upload your company or project logo. Set the project background by uploading a chosen image from the system along with an image that can be set as mobile app background.