Axpert 11
TStructs (Forms)
- Create Form
- Create DC
- Create Fields
- Grid DC/frames
- Formulae in fields
- SQL in fields
- Drop down fields
- Autogenerate fields
- Table fields
- File upload fields in forms
- Photos &Image fields
- Barcode /QR Code Scanner
- Fill Grid
- Posting data – Gen maps
- Updating fields in DB tables – MD Map
- Toolbars in tstructs
- Tracking changes/Audit trial
- Try it yourself
IViews
Scripts
Axpert Jobs
Axpert Cards
HTML Plug-ins
Users & Roles
- Users, roles & responsibilities
- Responsibilities
- User Role
- User Login
- SSO Authentication
- Stay Sign In
Workflow
Axpert API
Application Var/Params
Publish Axpert Apps
Axpert Mobile
Settings
- Axpert installation
- Change password
- Forgot Password
- Developer Options
- Global Settings
- In-Memory DB
- Notifications for Long Running Webservice’s
- Axpert Configuration on web
- Axpert Licensing
Utilities
Customization
- Main Page Customization
- Home Page Customization
- More API
- Custom User Interface
For Reports - Custom HTML In Forms
- CSS And JS Customization
- Developer Notes
- Hooks In Forms
- Third Party SSO Integration
WebServices
Axfast
Axpert Utility
Contents
- Arrange Menu
- SQL
- Get Axpert API
- Custom SQL
- App variables/params
- Import Definition
- API Definition
- Email Definitions
- Publish Listing
- Table Descriptor
- Downloads
- Custom Datatype
About Utilities in Axpert
A set of useful functions have been made available on the developer site under the utility option in the menu bar.
Arrange Menu
To organize the menu and exhibit only the required details on the run site, the Arrange menu option can be used. This is useful when there are multiple Tstructs/Forms that exist in the same workspace and need proper rearrangement. In order to achieve a sorted view of the menu on the run site, an arrangement of forms and scripts should be performed on the developer site.
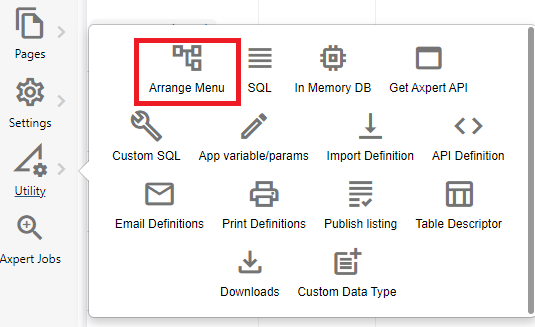
Click on the Arrange menu option available under utility.
You can find the list of all the forms and Tstructs that have been created in the workspace.
From the list select the required item that needs to be sorted. Drag and drop the selected item according to the requirement. Click on save to finalize the arrangement.
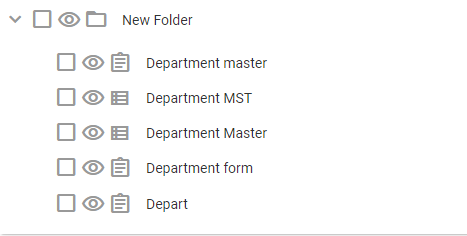
A new folder can be created by using Add Folder option on the top right. Items can be moved into the newly created folder accordingly. Click on the Save button after moving required items successfully.
For example, moving all the department-related items to the new folder.
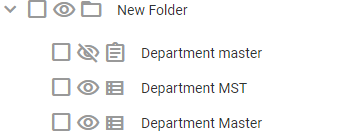
The arrange menu option also lets you hide selected items being displayed on the run site. Items can be hidden by clicking on the hide button near the check box.
For example, as shown in the image below the Department master item will not be displayed on the run site when executed.
SQL
A standardized programming language used to manage relational databases and perform various operations on the data can be used in Axpert.
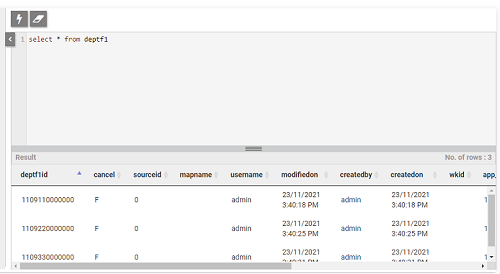
The SQL option in the utility allows the user to execute SQL queries and fetch details from the Tstructs/forms. For example, fetch all the values present in the department table named deptf1.
Get Axpert API
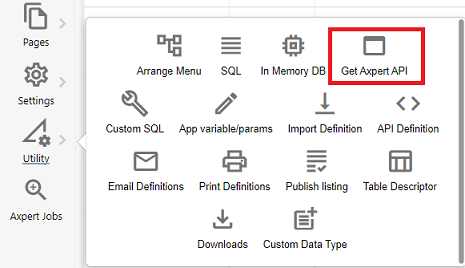
Axpert APIs are intermediaries that establish a connection between different applications and allow communication with each other. To generate an Axpert API, go to Utility and click on Get Axpert API.
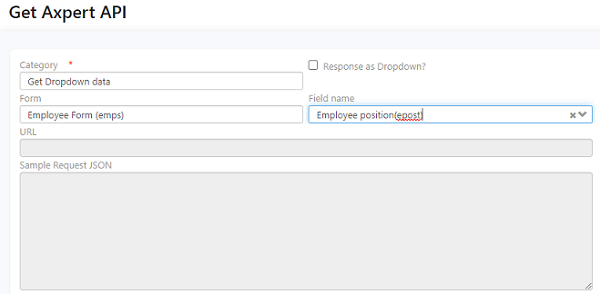
Choose the desired category from the list. Select the form and particular field name you want to generate API for. The URL and sample request JSON are autogenerated, that can be used while defining your API.
App variables/params
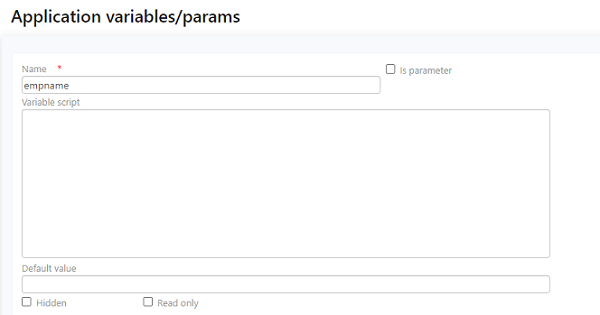
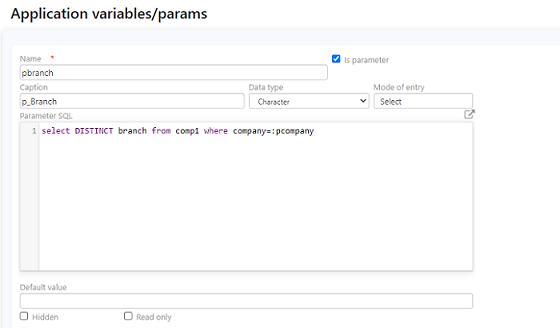
Application variables can be added by defining the variable name and variable value. As the name suggests the variable can hold different values based on the assignment. The variable value can be a constant value. Data from the database may be read and assigned to these vars. Use FireSQL & SQLGet functions in the script to assign values.
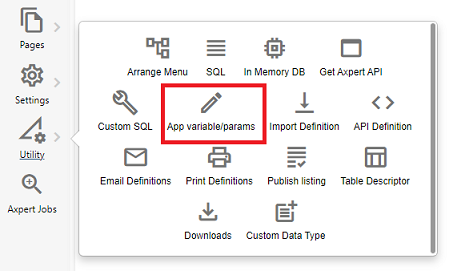
To define application variables in Axpert, go to Utility and click on App vars/Params. Define a script or set a default value for the variable and click on Submit.
Below is the list of default application variables:
- Username – Logged in user name
- Userrole – logged user roles, comma-separated role names
- Connection name – the name of the connected schema.
- Axp_language – selected language.
- Axp_timezone – time zone from of the server.
- Siteno – This contains the logged-in site no. This is useful only in the case of multi-site deployments with data synchronization.
One or more application parameters can be defined. The parameter values will be accepted by the user after login. To define a parameter, click on the “is parameter” checkbox on the top of the variable name. Provide appropriate SQL query to be executed or default values.
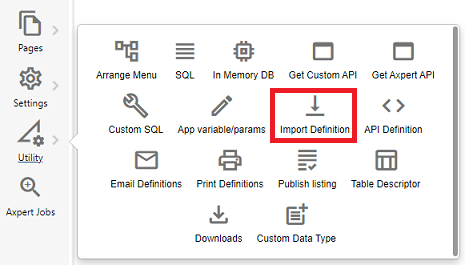
Import Definition
Click on Import Definition in the Utility section.
Insert appropriate values in the definition as per the requirement
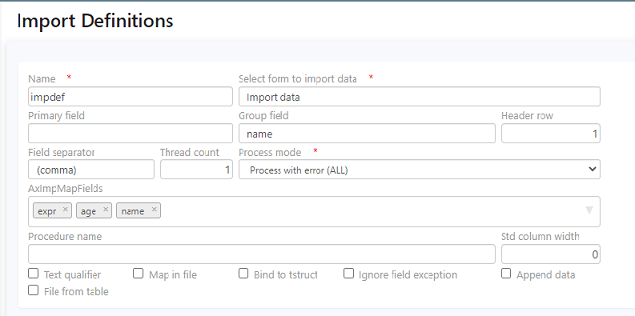
Use AxImport in the script of the Tstruct where you want to import data. Place the file you want to import from, in the same path.
AxImport({impdef},{\\server_ip\file_path \filename.csv},username)

Create a button for import from the Toolbar of the Tstruct.

Click on Submit, and save the structure.
Go to the run site and find the executable Tstruct.

Click on the button created for importing data.
On Success, the data from .csv should reflect in the run site and the file should move from the existing path to the Success folder.

On failure, the data from the file will not be imported and the file is moved to the Fail folder in the same path.
Open the list view and find the imported data in the Tstruct.
API Definition
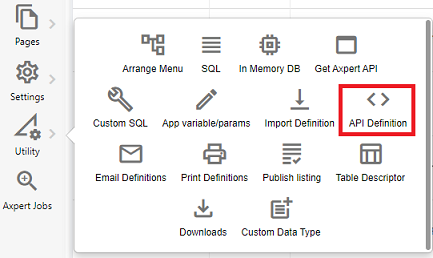
To define your own API, select API definition in the Utility section.
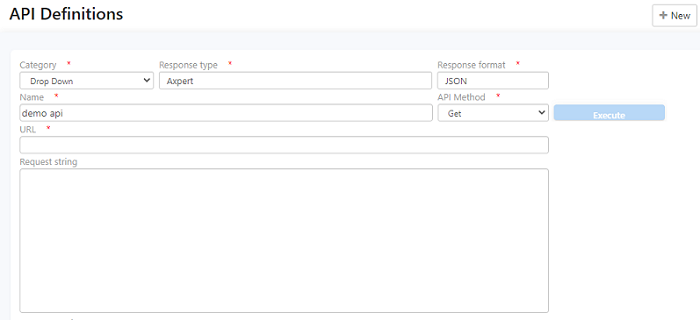
On the API definition page
-
- Select the category
- Select the response type- Axpert or External
- Select the Response format
- Name the API with a suitable name
- Select an API method- Get, Post, Put
Note: Paste the API URL and response string generated using the ‘Get Axpert API option’ accordingly.
- Insert the API URL
- Insert the Response String
- Click on Submit to save your definition
Email Definitions
Emails can be sent to users using email definitions against respective Tstructs and Iviews.
To send an email, set the email definition which can be invoked in the script.
How to define an Email?
On the developer site, Go to Utility and click on Email Definitions.
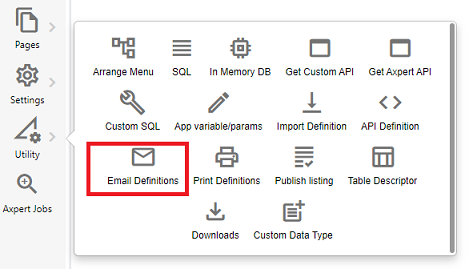
Define Email by clicking on “New” and inserting appropriate values.
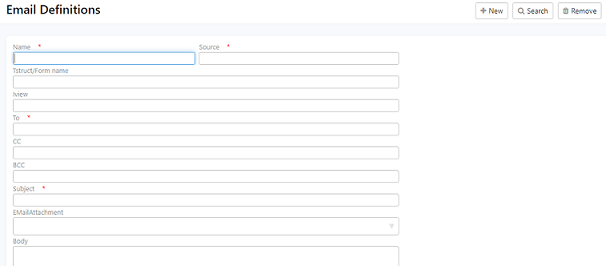
How to get started?
Create a Tstruct with desired fields and write scripts for invoking email definition. For example, create a Tstruct named email testing with name, age, transno, priority. Write a script calling the email definition as shown below.
SendEMail({testemail},recordid)
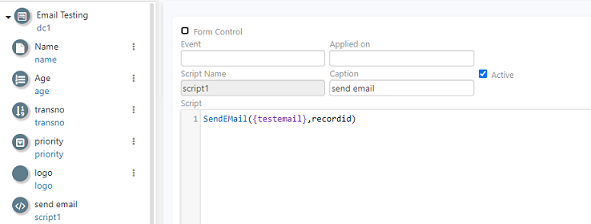
The “testemail” is an email definition defined in the utility section as shown below.
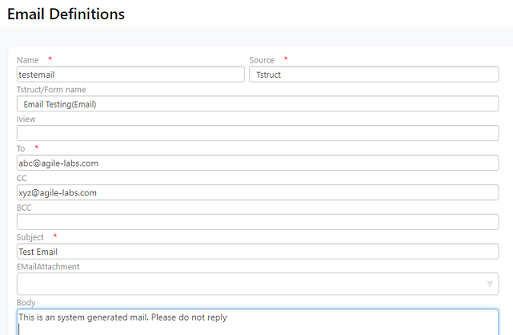
Create a button in the toolbar against the Tstruct, to trigger the email dispatch.

In the run site, use the button created to send mail. Load the data you want to send and click on “Send Email” button.

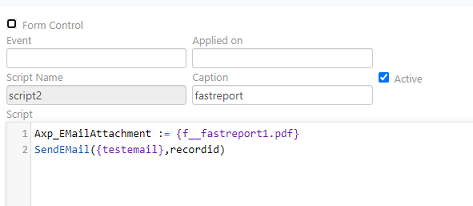
- To insert fastreport as an attachment use the following script
- To save before sending an email using the following script
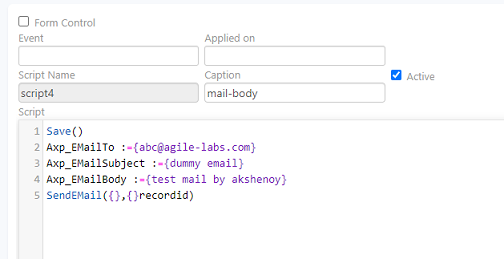
- To send email without defining them in the utility section, use the following script
- To send image as an attachment use the following script
- To include conditions while sending email use the script below
- To send a header attachment – Enable the “Allow attachment” in form properties.
- To send a uploaded file as an attachment.
Axp_EMailAttachment := {f__fastreport1.pdf}

SendEMail({testemail},recordid)
 Save()

SendEMail({testemail},recordid)
Axp_EMailTo :={abc@agile-labs.com}

Axp_EMailSubject :={dummy email}

Axp_EMailBody :={test mail by akshenoy}

SendEMail({},{}recordid)
 Axp_EMailAttachment := {i__*.*}

SendEMail({testemail1},recordid)
 if (priority={High})

Axp_EMailAttachment := {\\1.1.1.1\file_Path\import\Agile labs.pdf}

elseif (priority={Medium})

Axp_EMailAttachment := {\\1.1.1.1\file_path\import\Agilelabs logo.png}

else

Axp_EMailAttachment :={i__*.*}

end

SendEmail({testemail},recordid)
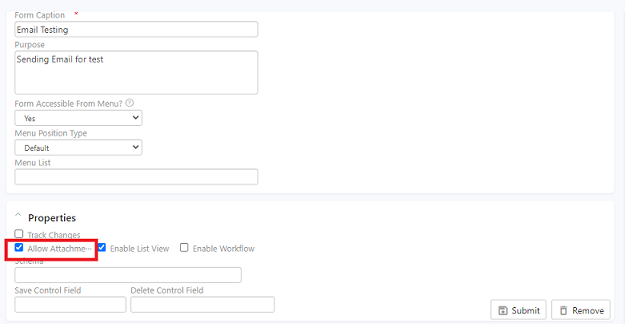
And use the following code in the script:
Axp_EMailAttachment :={a__*.*}

SendEmail({testemail},recordid)
Use the following code in the script:
Axp_EMailAttachment :={:axpfile_samplefilename__*.*}

SendEMail({emaildefinition_name},recordid)
How to send emails using Iviews?
Similar to sending data from the Tstruct, we can send Iview in the body of the email or as an attachment in either HTML, PDF, or excel.
- To send an email with Iview data in the body of the mail.
- To send individual rows of an IView
Create an Iview and fetch the field names from the respective Tstruct.
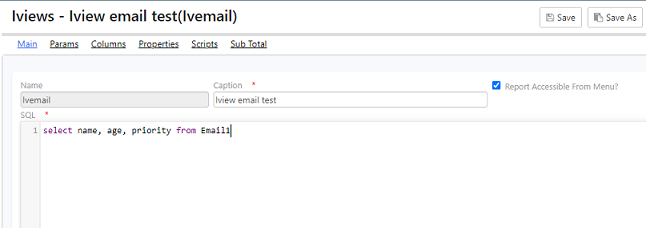
In the scripts, including the email definition that was defined in the Utility section as shown.

For example, fetch name, age, priority from the table Email1
select name, age, priority from Email1
and write a script to send email. In the below snippet IVemail is the user defined email definition.
SendEmail({ivemail},{})
Create an Iview to fetch the details
select username, password,'h6,hyperlink,accountcircle' as axrowoptions from axusers
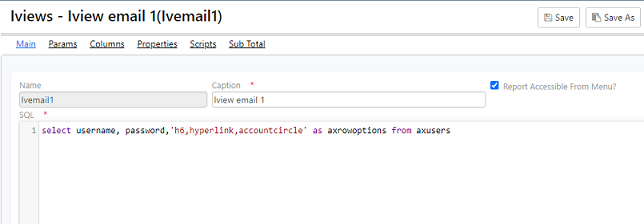
Then, write a script to send an email

Create a button from the Toolbar to trigger send.

Publish Listing
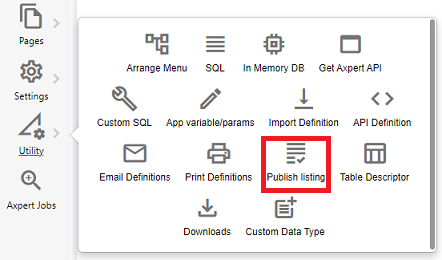
To publish Tstructs from one instance to another we can use Publish Listing option from the Utility section.
Click on Add Server option available on the top right corner, to begin with, the server configuration.
Next, On the server configuration page
- Select the Server type Publish or
- Enter the name of the server where you want the instance
- Enter the URL of the server where the instance has to be
- Enter Axpert connection name (schema name) where the instance has to be
- Click on
On Submission, Click on Publish Listing. This will direct to the structure listing page.
Select the server name and choose the Tstructs, Views, Pages to be published from the list and click on Go. The published items can be found on the run site of the Axpert connection provided during configuration.
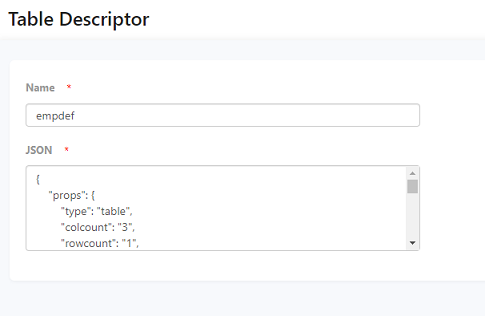
Table Descriptor
To define Dynamic table fields we use table descriptor and it should be defined in JSON. In the run site, based on the condition the table will be displayed accordingly.
For example, if an application is to be filled by the employee, the form will have a date, name, department an extra column called reporting manager. If a manager is filling out the same form, it will just have three columns date, name, department. The employee table should have a Definition Source Field, which will have the condition to filter the employee and manager.
Downloads
This option in the utility allows you to download the Axfast application that is useful for the creation of custom reports.
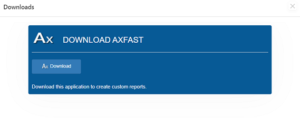
Click on the download button. A .exe file gets downloaded into the system.
Run the application as administrator and install it in the desired system location.
Click on agree to terms and conditions.
Click on Install.
On success “Axfast has been successfully installed” message appears.
Click on finish.
Open the Axfast and connect your application by creating a new connection.
• Choose the database
• Enter the URL
example: http://192.x.x.x/devscripts
Where devscripts is an Axpert web or run script site name from IIS
• Enter a remote project name: enter run-time schema name, example: agilerp
• Click on Test connection
• On success “Test connection successful” message appears.
Log in to your application with your credentials
Find all the forms/tstructs in the create axpert form drop-down.
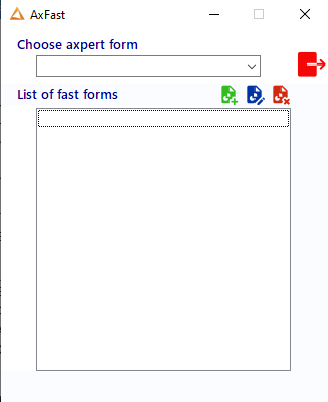
Create a new report by clicking on the new icon (green).
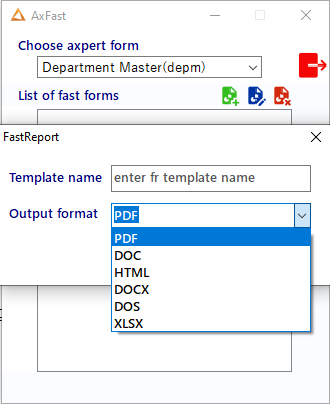
Enter a suitable name for the report.
Choose the output format for the report and Click on Design report. Proceed with the regular report creation steps on Axfast.
Custom Datatype
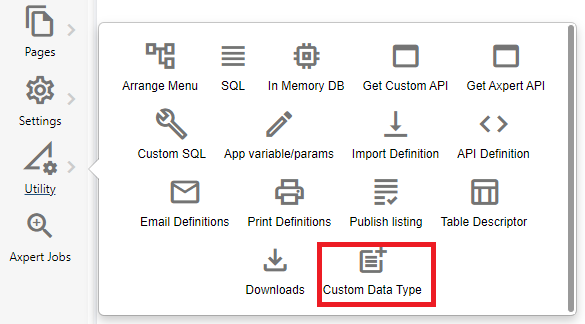
To define a user-defined data type, go to utility –> custom datatype
To create a new data type, click on new on the right top. Enter the appropriate name and choose the type from the drop-down as shown.
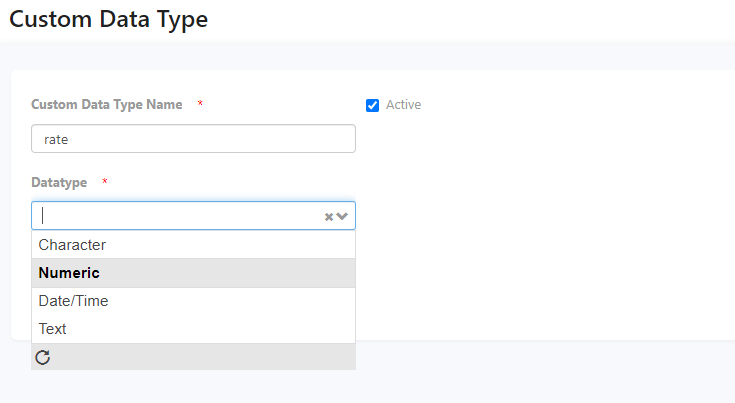
After the type is chosen, set the width and decimal for the data type. For example, Width -6 and decimal-4. Click on Submit.
Next, go to a Tstruct and create a field based on the data type you created. For example, here we create a numeric field like a whole number as the defined type is numeric.
Enter the name and caption and choose the custom data type defined from the drop-down

On choosing, the width and decimal get aligned with the custom data type value is defined. For example – default width -10. After choosing the Custom data type, the width and decimal are 6 and 4 respectively. Click on submit and save the created field to proceed.


