Axpert 11
TStructs (Forms)
- Create Form
- Create DC
- Create Fields
- Grid DC/frames
- Formulae in fields
- SQL in fields
- Drop down fields
- Autogenerate fields
- Table fields
- File upload fields in forms
- Photos &Image fields
- Barcode /QR Code Scanner
- Fill Grid
- Posting data – Gen maps
- Updating fields in DB tables – MD Map
- Toolbars in tstructs
- Tracking changes/Audit trial
- Try it yourself
IViews
Scripts
Axpert Jobs
Axpert Cards
HTML Plug-ins
Users & Roles
- Users, roles & responsibilities
- Responsibilities
- User Role
- User Login
- SSO Authentication
- Stay Sign In
Workflow
Axpert API
Application Var/Params
Publish Axpert Apps
Axpert Mobile
Settings
- Axpert installation
- Change password
- Forgot Password
- Developer Options
- Global Settings
- In-Memory DB
- Notifications for Long Running Webservice’s
- Axpert Configuration on web
- Axpert Licensing
Utilities
Customization
- Main Page Customization
- Home Page Customization
- More API
- Custom User Interface
For Reports - Custom HTML In Forms
- CSS And JS Customization
- Developer Notes
- Hooks In Forms
- Third Party SSO Integration
WebServices
Axfast
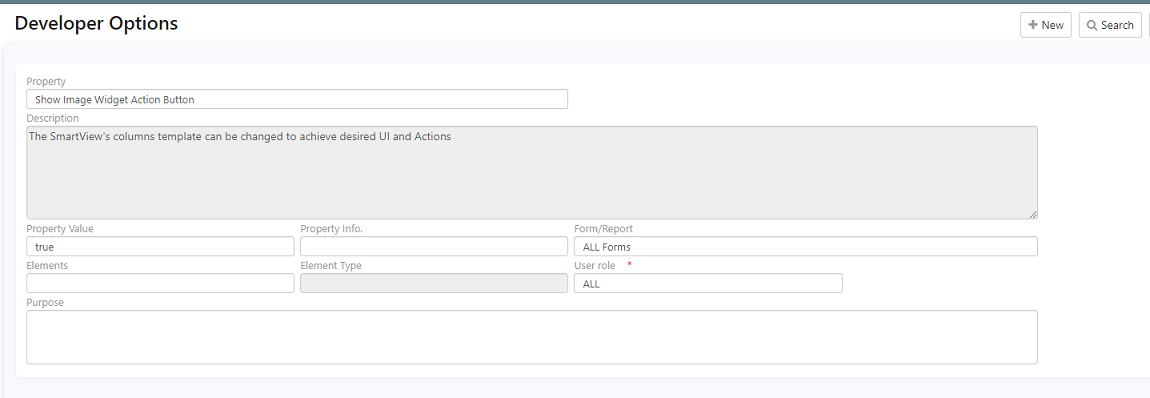
Developer Options
In this feature, you can control the display of forms/reports available in the application using Developer option. Developer Option provides you the access of managing the UI and functionality of forms and reports.Using this feature, you can control the functionality based on user roles, Forms/Reports and apply on all Forms/Reports.
To access the developer option window, navigate to the Settings icon on the right corner of the client area and click Developer option.
Contents
- Align Text
- ApplicationCompressedMode
- ApplicationTemplate
- Auto Save Draft
- Autocomplete Search Pattern
- Change Password
- Date Format
- Disablesplit
- Excel Export
- ExportVerticalAlign
- FetchSize
- Upload File Type
- File upload limit
- FormLoad Cache
- Hide Camera Option
- Landing Structure
- Load forms along with list
- Load reports/lists along with form
- Main Page Reload
- Multi Select Field
- Open Window mode
- Resolve Attachment Path
- Save Image in DB
- Trim IView Data
- Tstruct Grid edit option
- Fixed header for Grid
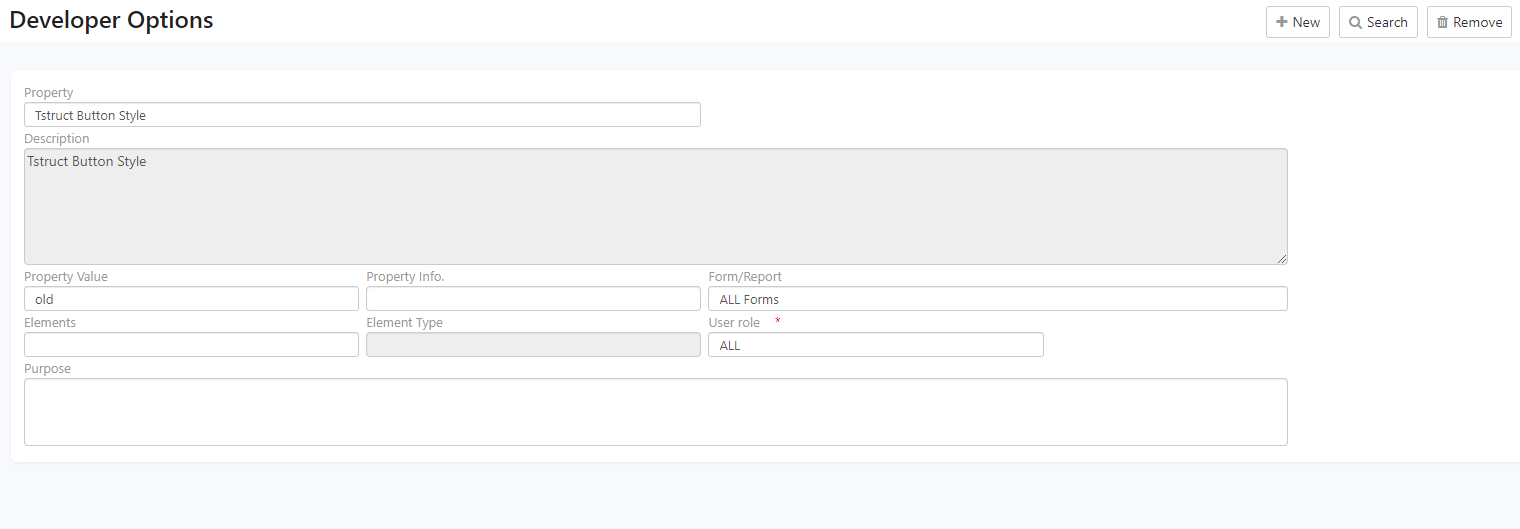
- Tstruct Button Style
- WebService Timeout
- Grid Scrollbar
- Show keyboard in Hybrid App
- Enforced Strong Password Policy
- Mobile Reports as Table
- Column Separator for Reports
- Custom JavaScript
- Custom CSS
- Google Map API Key
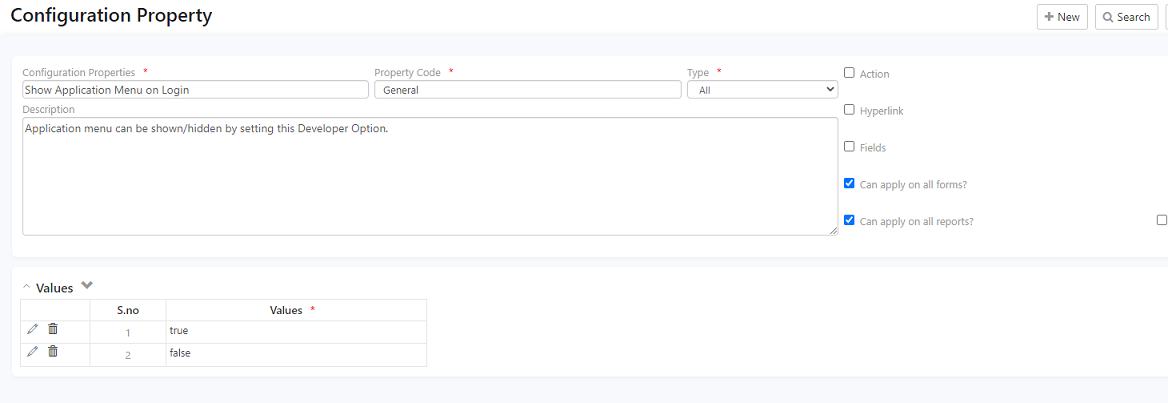
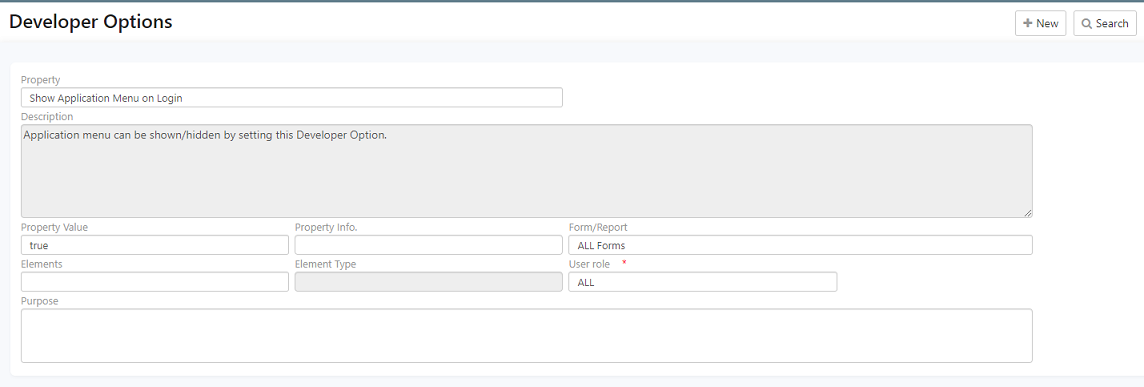
- Show Application Menu on Login
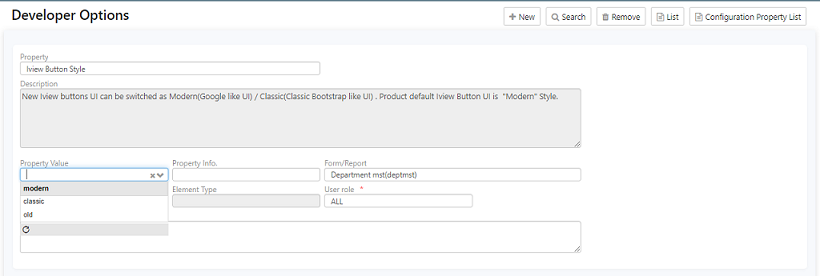
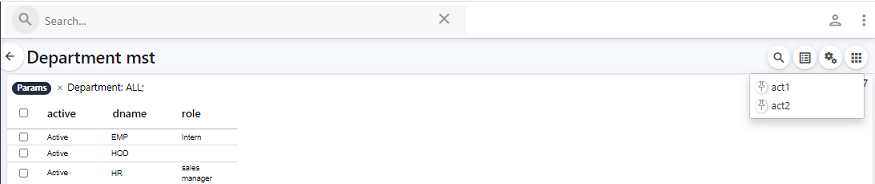
- Iview Button Style
- Iview Session Caching
- Load Old Model Views
- Notification time interval
- User Manual
- Open Fast Report In New Window
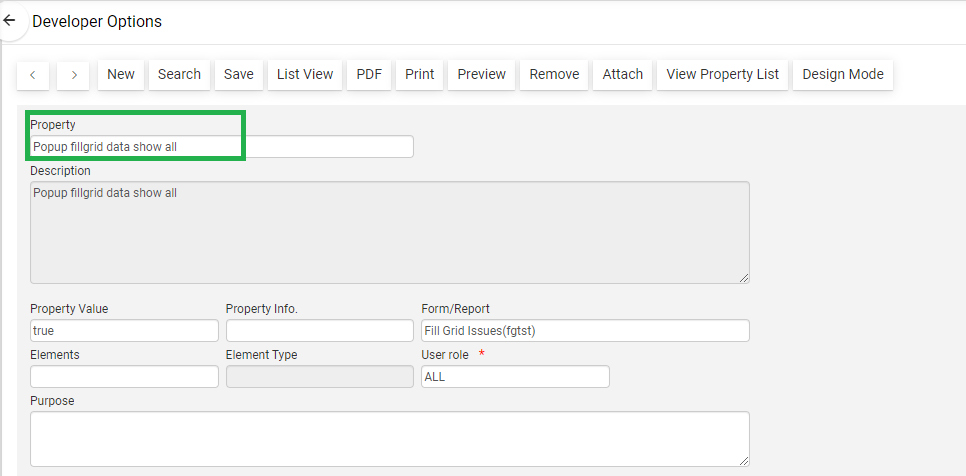
- Popup fill grid data show all
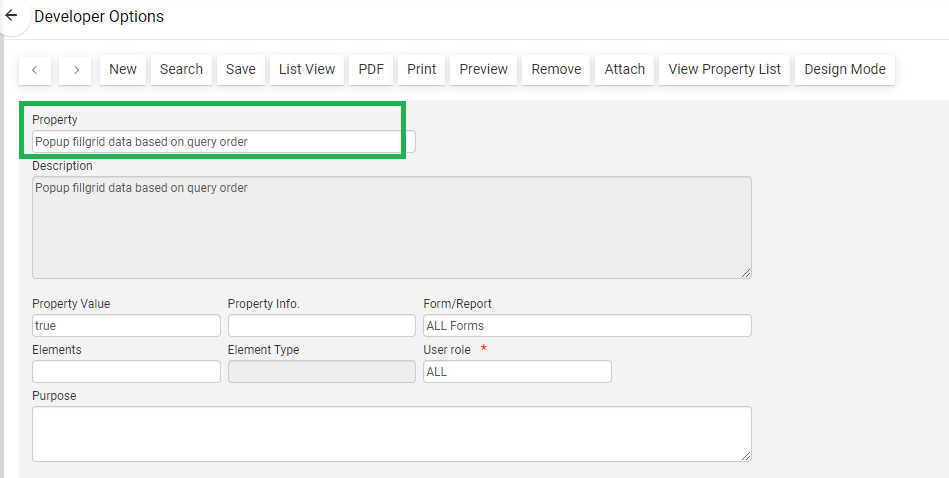
- Popup fillgrid data based on query order
- Option to configure default listview on click of a form
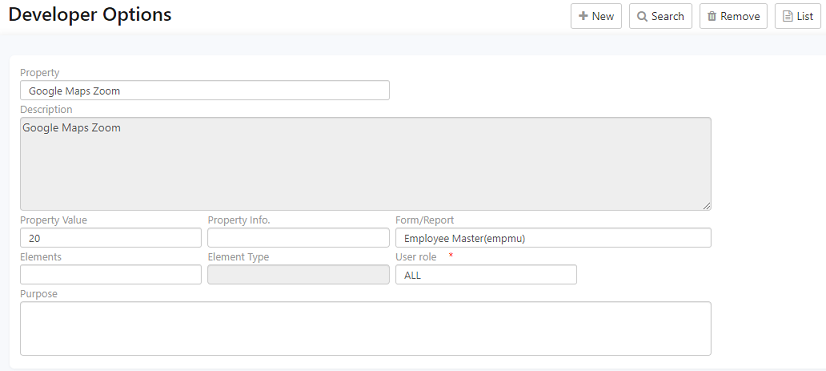
- Google Map has to be zoomed in when located
- Apply Mobile UI
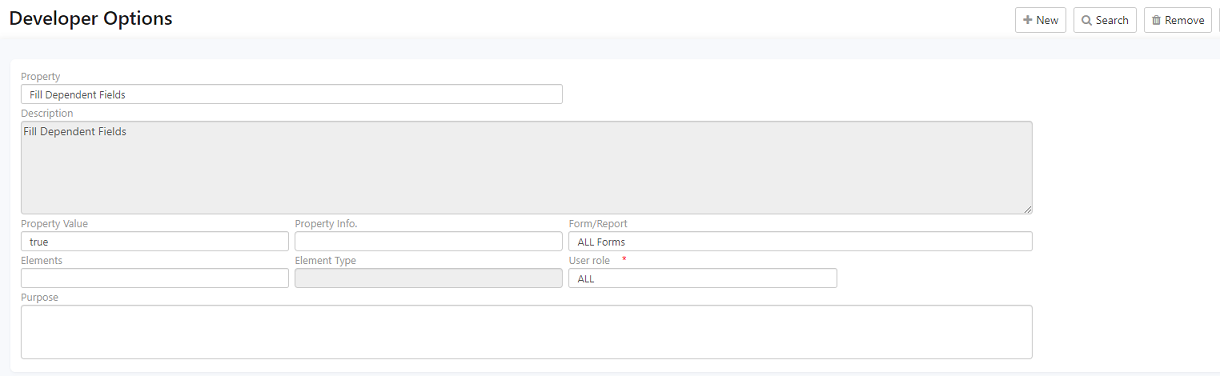
- Fill Dependent Fields
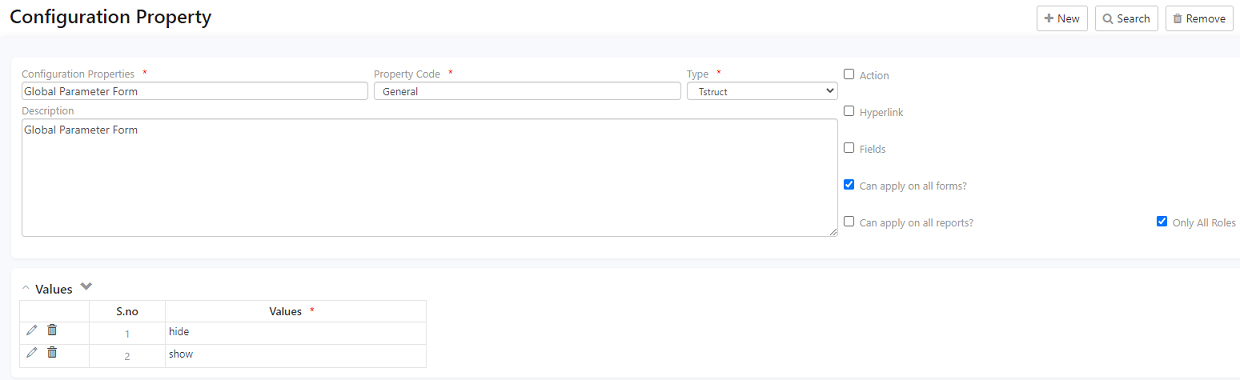
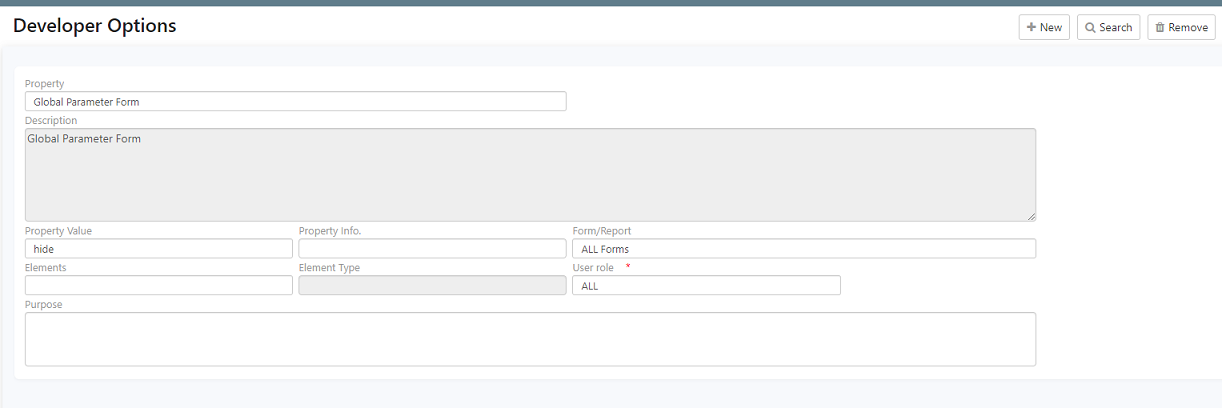
- Global Parameter Form
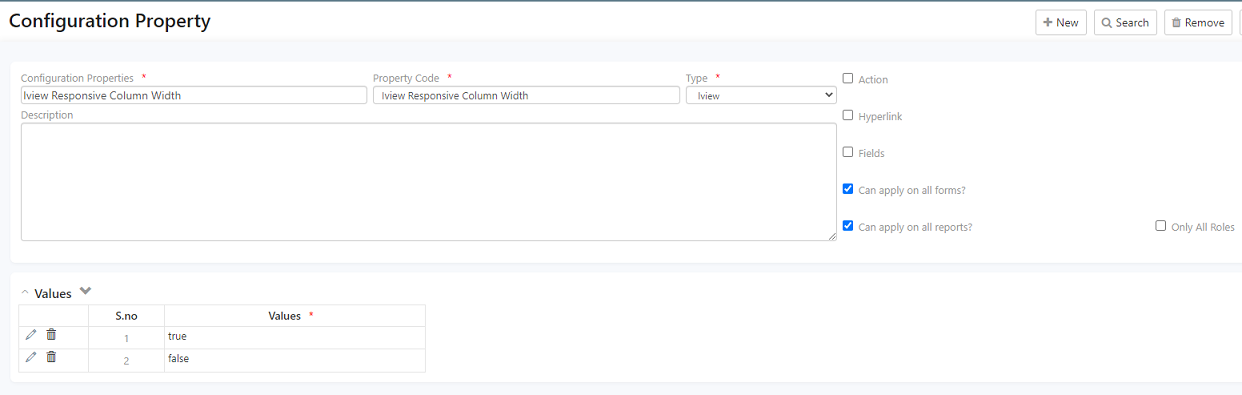
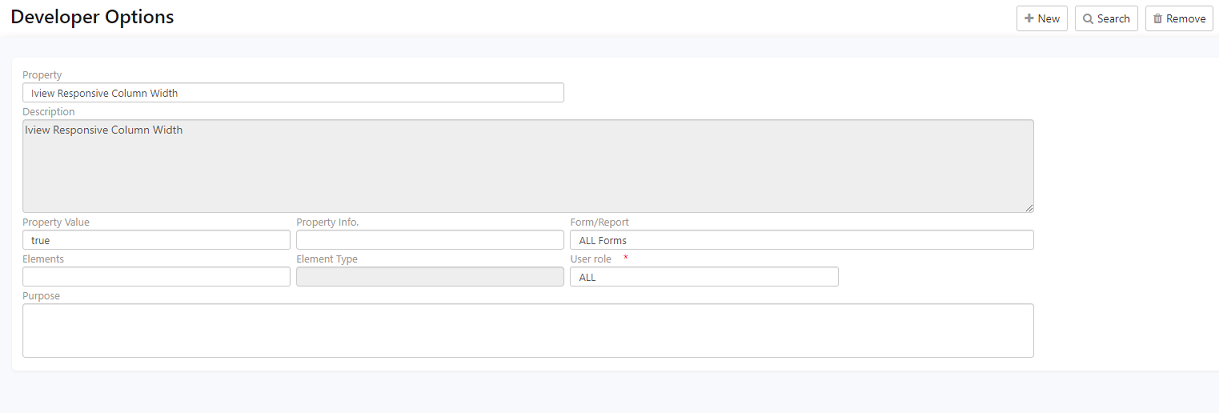
- Iview Responsive Column Width
- Iview Retain Parameters On Next Load
- Local Dataset
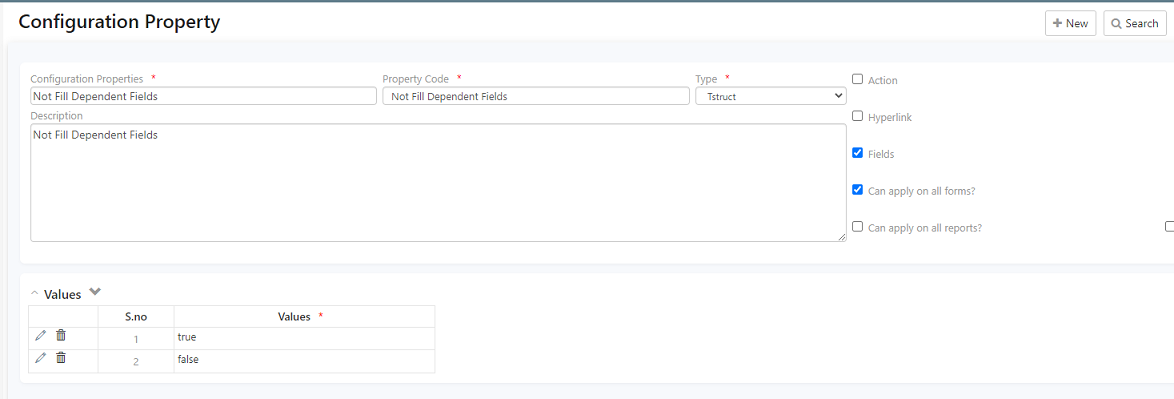
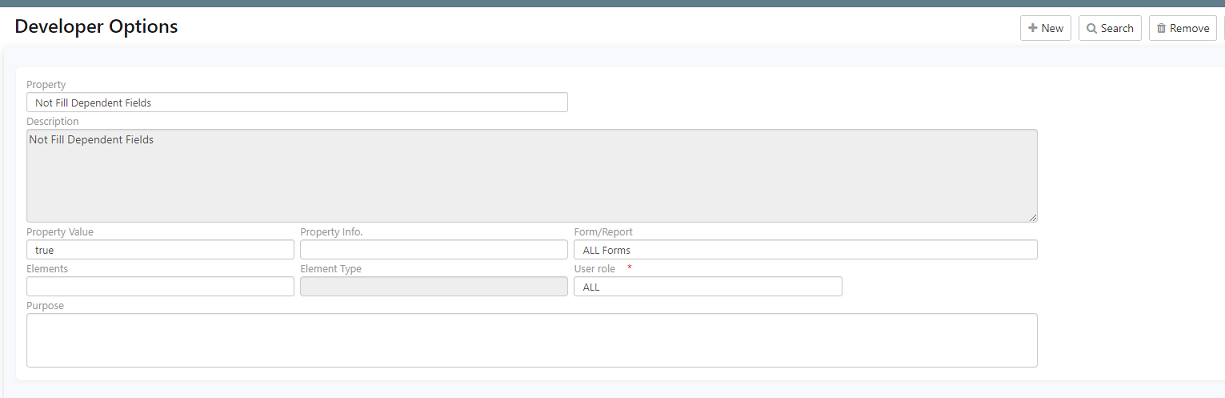
- Not Fill Dependent Fields
- Show Application Menu On Login
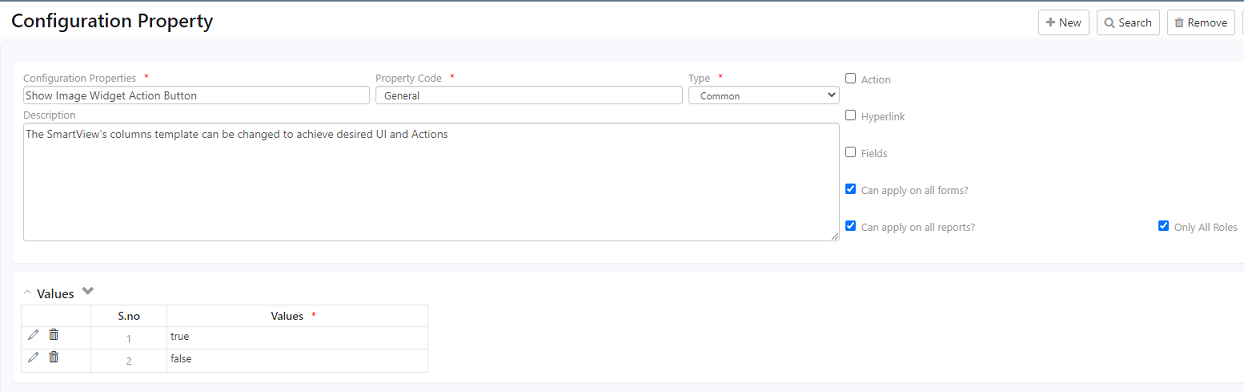
- Show Image Widget Action Button
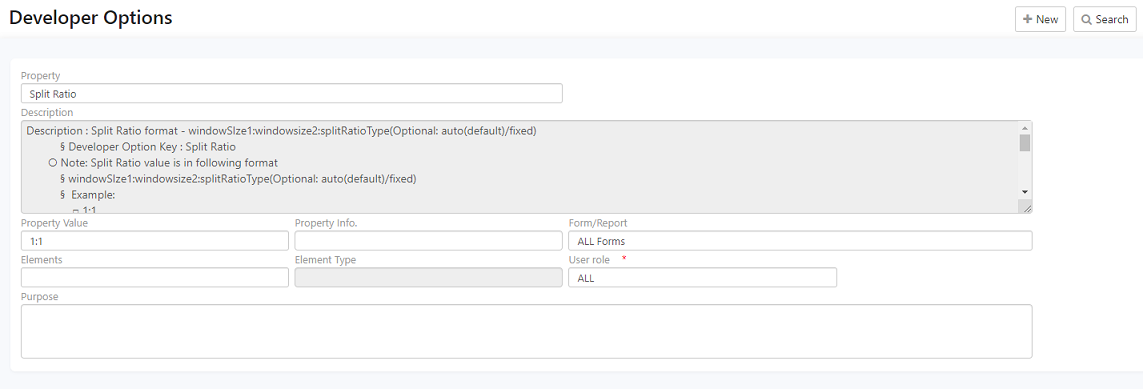
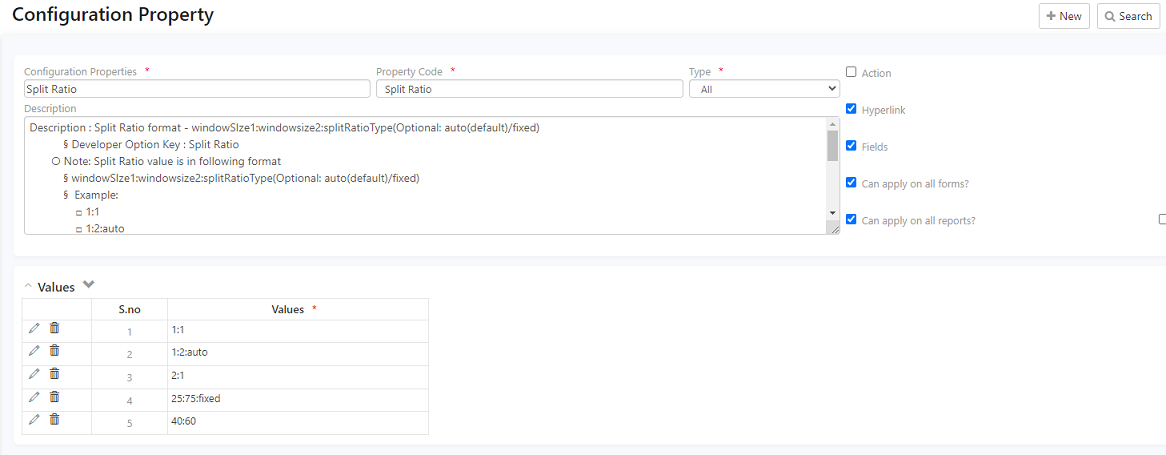
- Split Ratio
Align Text
This property will allow you to align the text of the field of any forms left/right.
To enable this feature
- Goto Setting –> Developer Options.
- Select Align Text in Property Field.
- Select Left or Right in Property Value Field.
- Select Form name in Form/Report field.
- Select Field name in Elements field.
- Click on Save button, logout and login to the application.
All the changes will reflect in that form.
ApplicationCompressedMode
This property will allow you to fit the page on screen, it will disable the card layout of the application.
To enable this feature
- Goto Setting –> Developer Options.
- Select ApplicationCompressedMode in Property Field.
- Select TRUE in Property Value Field.
- Click on Save button, logout and login to the application.
All the changes will reflect in that form.
ApplicationTemplate
Using this property you can change the application layout template. For more details refer Main Page Customization.
To enable this feature
- Goto Setting –> Developer Options.
- Select ApplicationTemplate in Property Field.
- Select HTML file in Property Value Field, by default file name is mainpagetemplate.html.
- Click on Save button, logout and login to the application.
All the changes will reflect in that form.
Auto Save Draft
if tstruct fields are changing after a particular time ,it will save the data in redis at regular intervals which can be set from developer options.
To enable this feature
- Goto Setting –> Developer Options.
- Select Auto Save Draft in Property Field.
- set Property Value to TRUE and time in millisecond(for ex for 60 secs give 60000).
- default time will be 120 seconds/2 minutes.
- In Form/Report you can select the form for which you want to enable this option.
- Click on Save button, logout and login to the application.
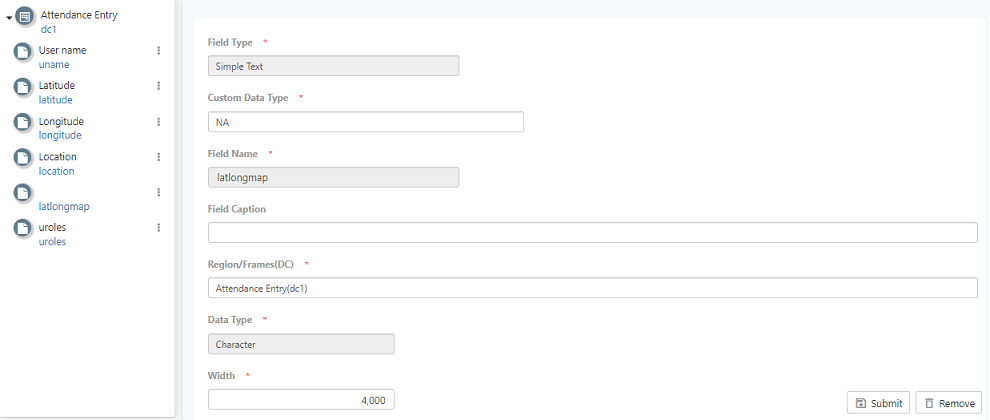
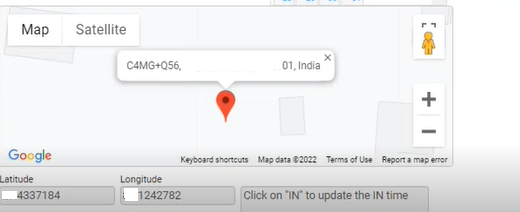
All the changes will reflect in that form. This property will allow you to search the values from picklist based on the given configuration. You can search the values using StartWith and Contains. To enable this feature All the changes will reflect in that form. Select this property to decide whether the change password option must be available or not in the application. NOTE: This property is mainly used for Agilecloud. To enable this feature All the changes will reflect in that form. Using this property you can change the date format to EN-US format, this is applicable for any forms as well as reports parameters. To enable this feature All the changes will reflect in that form. Select this option if you wish to disable split for specific forms and reports or for the entire forms and reports in the application. To enable this feature All the changes will reflect in that form. This option will allow you to enable Excel button in reports to download the report data into excel format. To enable this feature All the changes will reflect in that form. This property in developer option allows you to set excel row data vertical aligned. This property is applicable only for reports, it provides you option to align the excel row data in Middle(default), Top and Bottom. To enable this feature All the changes will reflect in that form. Select this option to decide the no. of records that has to appear in a report. Navigate to the property value and select the no. of records to appear. To enable this feature All the changes will reflect in that form. Select this option to limit the file uploads in forms. This will be applicable for a form or multiple forms. To enable this feature All the changes will reflect in that form. This requirement can be achieved by adding a developer option as below. Provided structures need to be applied along with this. Description: Use this key to allow particular file extensions as per forms. Select this property to cache the form load data based on global parameters. For more information on the form load cache, refer to the property value section. Based on the selected time, cache data gets updated. For e.g., if you select the time as 30min, for every 30 min, the cache gets updated by fetching the latest data from the database. If you select the property value as None, caching will never happen. If you do not select any time limit, caching gets updated after 24 hours. It means whenever user logs into the application for the 1st time on that particular date, data gets fetched from the database and gets stored in the cache and remains same until next day 12AM. To enable this feature All the changes will reflect in that form. Select this option if you wish to fix the header of the grid dc for specific forms and reports or for the entire forms and reports in the application. While uploading files it will show you camera option as well(it will support only with https), if this option is not require then you can hide this option using this property. To enable this feature All the changes will reflect in that form. Select this option if you wish to retain the previous parameter selected on the next load for specific reports or for the entire reports in the Select this option if you wish to extend the column width in iviews up to the viewport for specific reports or for the entire reports in the application. Select this property to decide the landing page once you login any Axpert application. For e.g., as soon as you login to an application, you can decide what content has to appear in the landing page. The content can be either a particular form/report. After selecting the form/report, if you logout and login to the application, the selected form/report appears as a landing page. NOTE: This property is mainly used for Agilecloud. To enable this feature All the changes will reflect in that form. Select this option to split the form automatically. You can open a form along with list by using any action or without actions. To enable this feature All the changes will reflect in that form. Select this option to split a report automatically. If iview is having hyperlink, you can open a report along with the form. And you can open a report along with form by using any action or without actions. To enable this feature All the changes will reflect in that form. –This option is dependent on the landing structure property. This property is mainly used to end the actions performed on a form. For e.g., consider Global Parameters form as your landing structure. In that form, after performing each transaction, save the form, such as after entering the branch details, save the form. Again enter the location details and save the form. NOTE: This option is applicable for AgileCloud. To enable this feature All the changes will reflect in that form. This property will give a better user interface for selecting values from dropdown. refer [Add_components_to_a_Form#Define_Multi-Select|Multi Select] for details. To enable this feature All the changes will reflect in that form. Select this option to open hyperlinks in reports as a new page/popup and so on. If you select this option, system first checks if any forms are associated with the report to open else opens the hyperlink content of the first record on the right frame. To enable this feature All the changes will reflect in that form. This property is used for reports template in case of resolving image path to show visible image in iview templates. To enable this feature All the changes will reflect in that form. If application is storing all the files and images in different file server and you want to store the image in DB for particular form, then this property need to be enabled for that form. To enable this feature All the changes will reflect in that form. If iview data is having space then this property will help you to trim iview extra spaces. To enable this feature All the changes will reflect in that form. Select this option to select the type of grid that has to appear while editing the grid. The following values are available if you select the property as TStruct Grid edit option. To enable this feature All the changes will reflect in that form. To enable this feature Set Webservice Timeout property, if you have to deal with large data which takes more time, By default value will be 100000(in milisecond),you can add more time of required. To enable this feature All the changes will reflect in that form. In a form, when number of grid columns are more then horizontal scrollbar will show within the page for better accessibility. To enable this feature All the changes will reflect in that form. This property will help you to hide/unhide the keyboard option for auto-complete field in hybrid mobile app. To enable this feature All the changes will reflect in that form. This property will allow you to enforce user to set strong password. Password should be alphanumeric, contains one Uppercase Character, one Lowercase Character with at least one special character. To enable this feature All the changes will reflect in that form. Using this property you can enable tabular view for Reports in hybrid mobile application. To enable this feature All the changes will reflect in that form. Using this property you can provide column separator in reports[column separator line will show within the report]. To enable this feature All the changes will reflect in that form. Use this property to attach custom javascript to Forms and Reports. Set this property value to “True” for a selected form or report. If this property is set to true, the custom javascript file should be saved into the web root\<ProjectName>\tstructs\js folder(for forms) and root\<ProjectName>\tstructs\js folder(for reports). The file name should <tstructname>.js or <reportname>.js. In case this property is set to true for all forms or reports instead of a selected form or reports, the file name should be custom.js To enable this feature All the changes will reflect in that form. Use this property to attach custom CSS to forms and reports. Set this property value to “True” for a selected forms or reports. If this property is set to true, the custom CSS file should be saved into the web root\<ProjectName>\tstructs\js folder(for forms) and root\<ProjectName>\report\js folder(for reports). The file name should <reportName>.CSS. In case this property is set to true for all forms or reports instead of a selected form or report, the file name should be custom.CSS. To enable this feature All the changes will reflect in that form. To display the location on a map, introduce a field named ‘LatLongMap’. The field type should be text area. This will work only in non grid DC. The map will be displayed in this field with the lat and long pinned on the map. This needs to be integrated with google maps to work by providing the google map API key. Select the property name as ‘Google Map API Key’ for this form. To enable this feature All the changes will reflect in that form. Using this property you can show/hide the menu of the application. If it is set as FALSE then after login menu will be hidden automatically. To enable this feature SmartViews provide two types of button UI i.e. Modern and Classic Buttons, Using this property you can switch UI of buttons. To enable this feature Old style UI button Classic style UI button Modern style UI button Smart Iview Intelligent Data Caching can be enabled by using this developer option. The administrator can altogether disable the Modern SmartViews feature and switch back to old smartviews UI by adding using “Load Old Model Views” property. To enable this feature Once this key is added, long running web services/backend scheduled jobs completion can be notified to the user with given time intervals, so that user would be able to do other operations during long running web services/backend jobs. To enable this feature User can access the files through web application which are saved in local folder through User Manual option (located in right sidebar menu). To enable this feature This was introduced to open password protected fast report/pdf files after an action call. This applicable for In multiselect pop-up fillgrid, all data can be displayed at once if this option is enabled. To display data in returning order, use the above developer option. To enable this feature 1: World Description: Use this key to set the zoom level in google maps for particular / all tstruct Configure it with appropriate values In the form define a field named latlongmap that will display the map on the run time. Set the field width to 4000. In the run time, the map is displayed as shown The changes will reflect after you log out and log in to the application
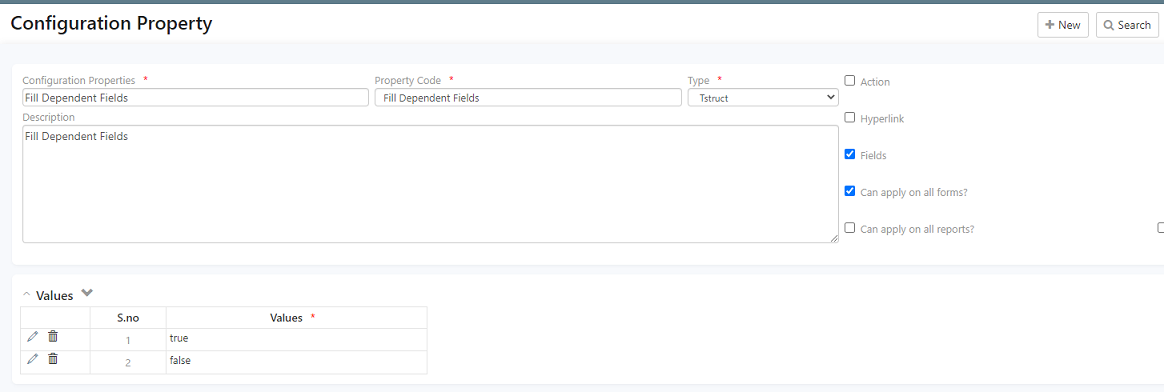
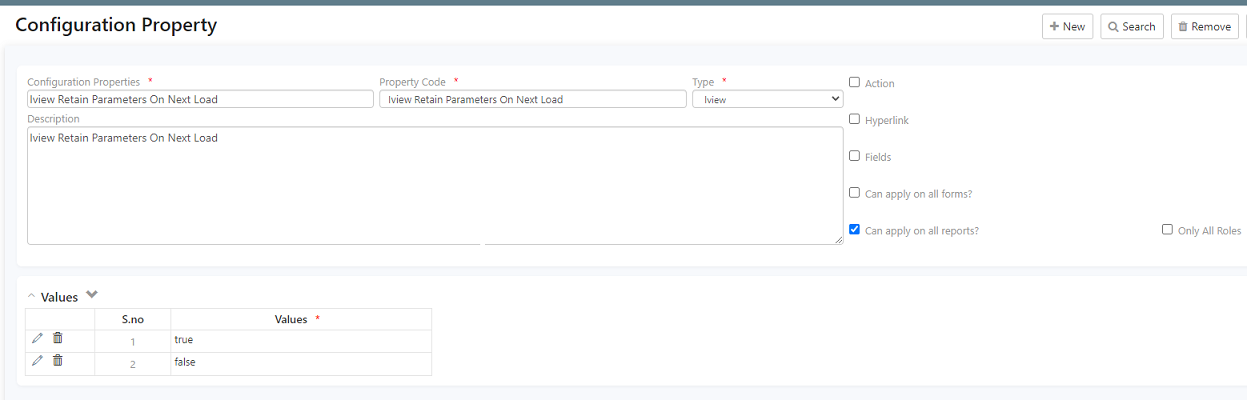
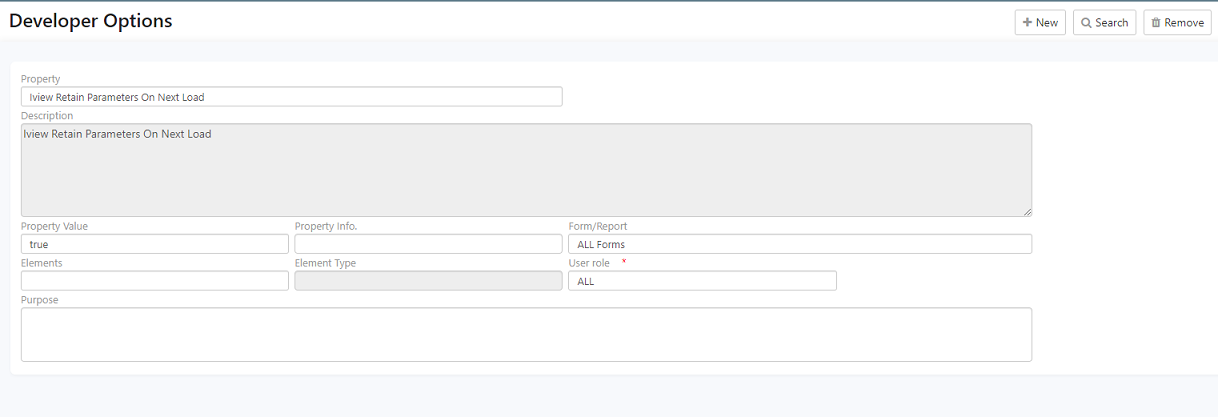
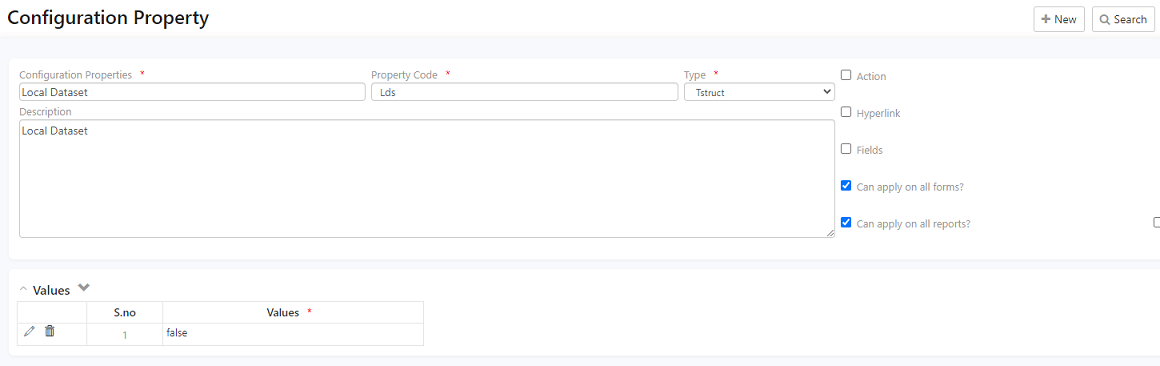
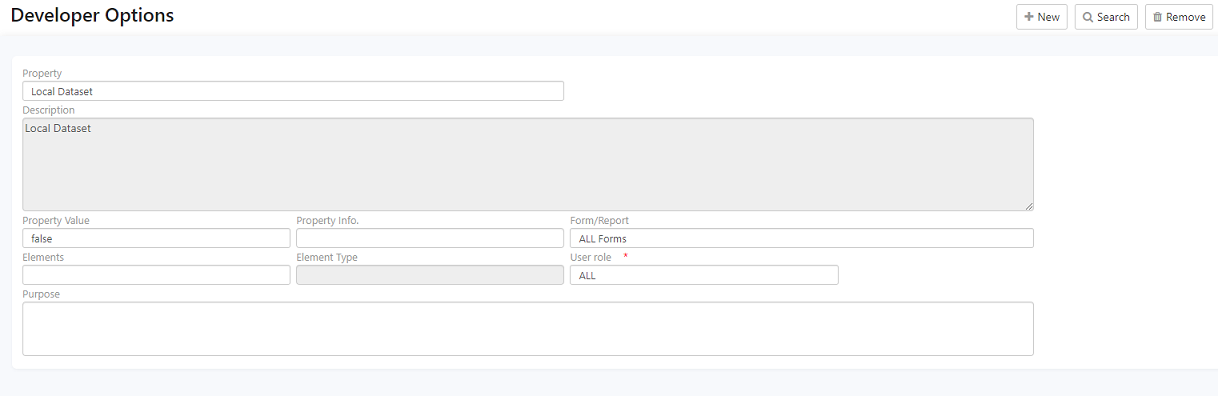
The configuration property of fill-dependent fields is shown below To enable this feature on your schema The configuration property of the global parameter form is shown below The configuration property of iview responsive column width is shown below. The configuration property of iview retains parameters on the next load is shown below. To enable this feature on your schema The configuration property of the local dataset is shown below. To enable this feature on your schema The configuration property of the Not Fill Dependent Fields is shown below. To enable this feature on your schema The configuration property of the show application menu on login is shown below. To enable this feature on your schema The configuration property of the show image widget action button is shown below. To enable this feature on your schema The configuration property of the split ratio is shown below.
Change Password
Date Format
Disablesplit
Excel Export
ExportVerticalAlign
FetchSize
File upload limit
Upload File Type
Developer Option:
FormLoad Cache
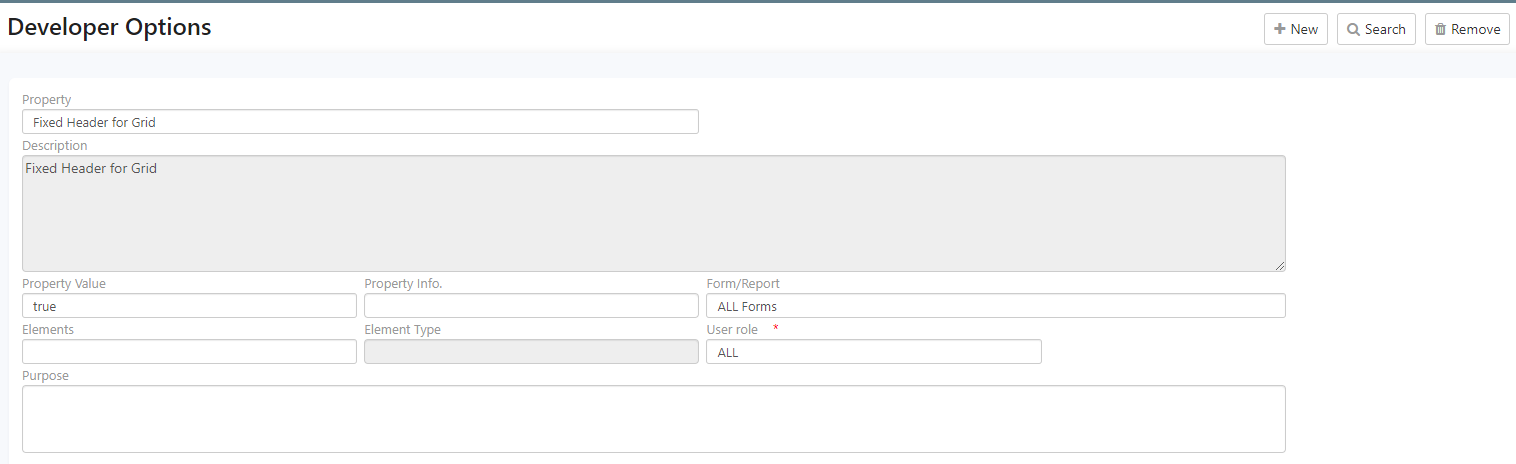
Fixed Header for grid
To enable this feature
1. Goto Setting –> Developer Options.
2. Select fixed header for option in Property Field.
3. Select TRUE in the Property Value field.
4. Select the form/report.
5. Click on the Save button, log out, and log in to the application.
All the changes will reflect in that form.Hide Camera Option
Iview retain parameters on next load
application.
To enable this feature
1. Goto Setting –> Developer Options.
2. Select Iview Retain Parameters on Next Load in Property Field.
3. Select TRUE in the Property Value field.
4. Select the form/report.
5. Click on the Save button, log out and log in to the application.
All the changes will reflect in that form.Iview responsive column width
To enable this feature
1. Goto Setting –> Developer Options.
2. Select Iview Responsive column width in Property Field.
3. Select TRUE in the Property Value field.
4. Select the form/report.
5. Click on the Save button, log out, and log in to the application.
All the changes will reflect in that form.Landing Structure
Load forms along with list
Load reports/lists along with form
Main Page Reload
Multi Select Field
Open Window mode
Resolve Attachment Path
Save Image in DB
Trim IView Data
Tstruct Grid edit option
Fixed header for grid
WebService Timeout
Grid Scrollbar
Show keyboard in Hybrid App
Enforced Strong Password Policy
Mobile Reports as Table
Column Separator for Reports
Custom JavaScript
Custom CSS
Google Map API Key
Show Application Menu on Login
Iview Button Style


Iview Session Caching
Load Old Model Views
Notification time interval
User Manual
Open Fast Report In New Window
To enable this option
Form/Report types : All Forms / All Reports / Single Form/ Single Report
User Role: All / Single rolePopup fill grid data show all
To enable this option
Popup fill grid data based on query order
Option to configure default listview on click of a form
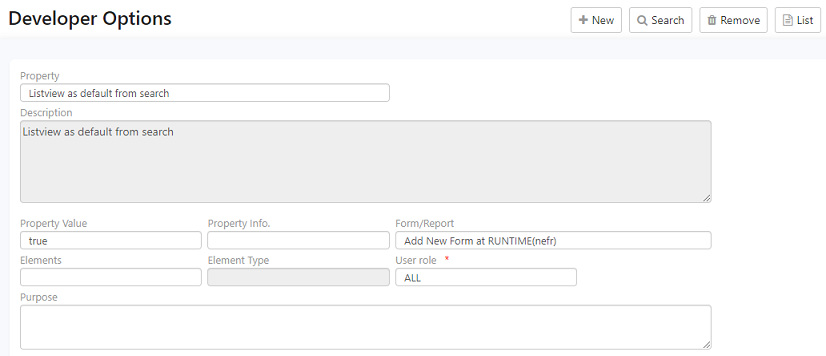
Go to the run site and search for the form name, select the form and find the list view of the data entries on the page.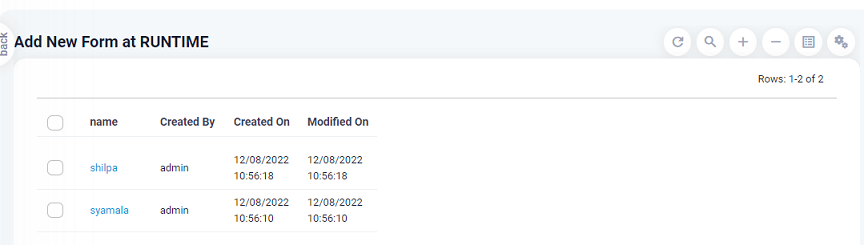
Google Map has to be zoomed in when located
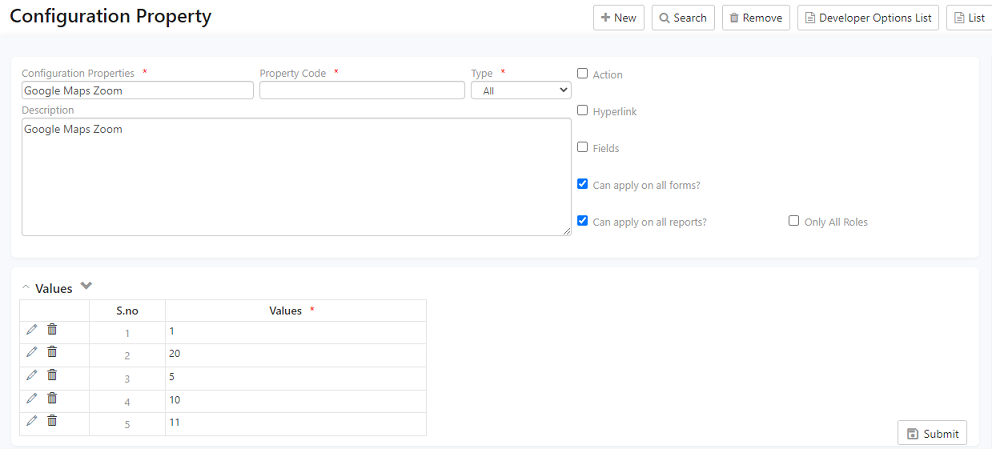
5: Landmass/continent
10: City
11: Default
15: Streets
20: Buildings
Google map has to be zoomed in when located. It should show nearby areas.
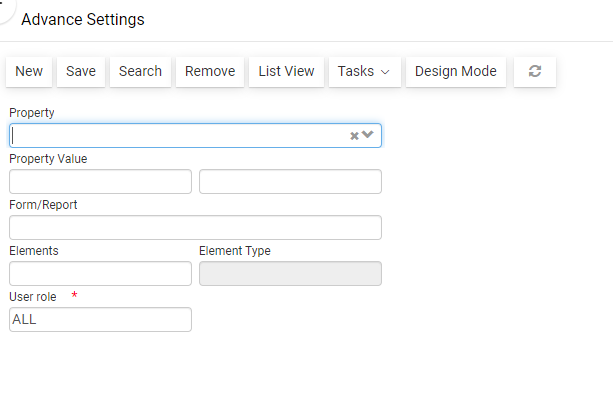
In Advanced settings create a google maps zoom key.
Apply Mobile UI
Fill Dependent Fields
Global Parameter Form
To enable this feature on your schema
Iview Responsive Column Width
To enable this feature on your schema
Iview Retain Parameters On Next Load
Local Dataset
Not Fill Dependent Fields
Show Application Menu On Login
Show Image Widget Action Button
Split Ratio
To enable this feature on your schema