Axpert 11
TStructs (Forms)
- Create Form
- Create DC
- Create Fields
- Grid DC/frames
- Formulae in fields
- SQL in fields
- Drop down fields
- Autogenerate fields
- Table fields
- File upload fields in forms
- Photos &Image fields
- Barcode /QR Code Scanner
- Fill Grid
- Posting data – Gen maps
- Updating fields in DB tables – MD Map
- Toolbars in tstructs
- Tracking changes/Audit trial
- Try it yourself
IViews
Scripts
Axpert Jobs
Axpert Cards
HTML Plug-ins
Users & Roles
- Users, roles & responsibilities
- Responsibilities
- User Role
- User Login
- SSO Authentication
- Stay Sign In
Workflow
Axpert API
Application Var/Params
Publish Axpert Apps
Axpert Mobile
Settings
- Axpert installation
- Change password
- Forgot Password
- Developer Options
- Global Settings
- In-Memory DB
- Notifications for Long Running Webservice’s
- Axpert Configuration on web
- Axpert Licensing
Utilities
Customization
- Main Page Customization
- Home Page Customization
- More API
- Custom User Interface
For Reports - Custom HTML In Forms
- CSS And JS Customization
- Developer Notes
- Hooks In Forms
- Third Party SSO Integration
WebServices
Axfast
Work flow
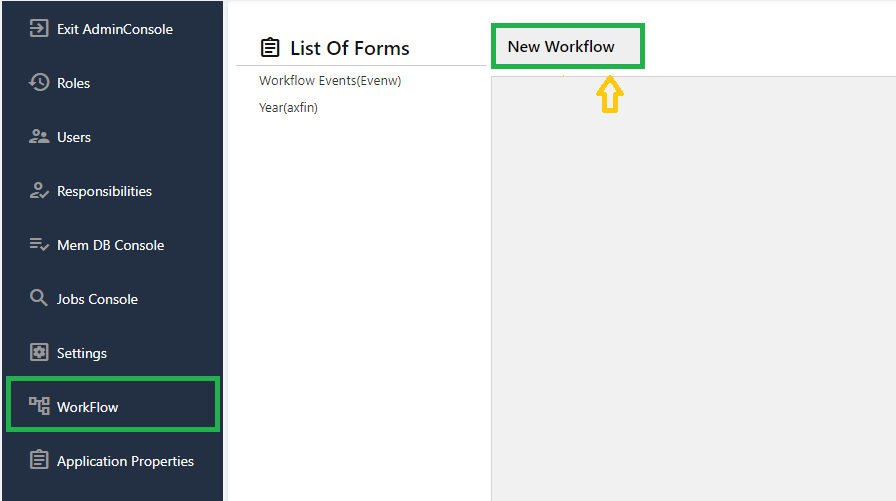
Work flows are enabled at the tstruct/form level. This property is available in form properties. The forms for which work flow is enabled are listed in work flow definition screen. Select the form and click on the New Work flow button.
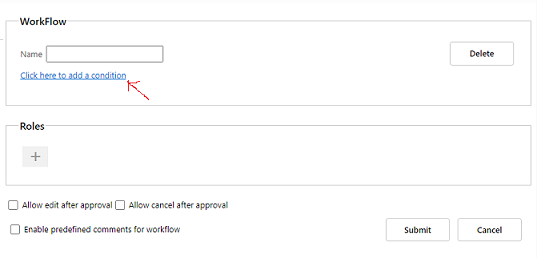
A form can have multiple workflows. A condition should be set for each workflow definition. This is mandatory if there is more than one workflow for a form. There can be only one workflow for a form without any condition. The condition can be set by clicking on the “Click here to add a condition” as shown below.
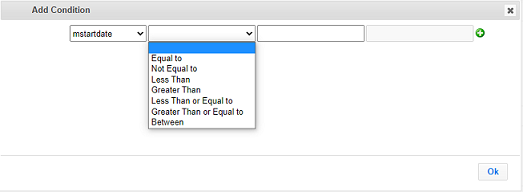
Add the required condition using the field name and click on “OK” to save.
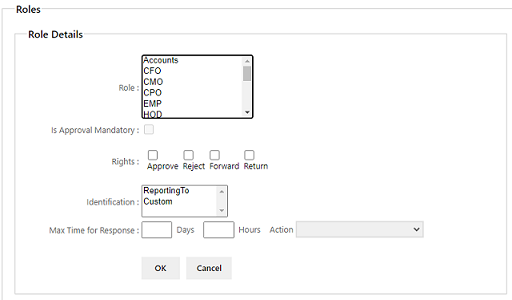
There are roles against which conditions are set at each level. The rights of the role, max time to respond, and action to do in case of inaction are set.
When a transaction is created for the first time in run time, it is sent for approval to the role given in level 1 in the workflow definition. For example, if the purchase order value is between 5000 to 10000 the approval request should be sent to the CFO.
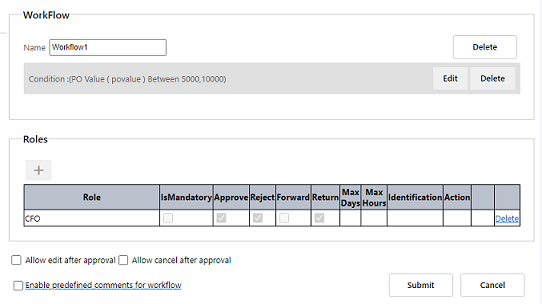
If there is more than one workflow for this form, the workflow to be used is selected based on the given condition. On approval at a level, it is sent to the role in the next level till the last level is reached. Once the last level approves, the transaction data is marked as Approved. For example, if approval is required from PM and CFO for purchase orders of more than 10,000, the request will be sent to PM which should be forwarded to the CFO.
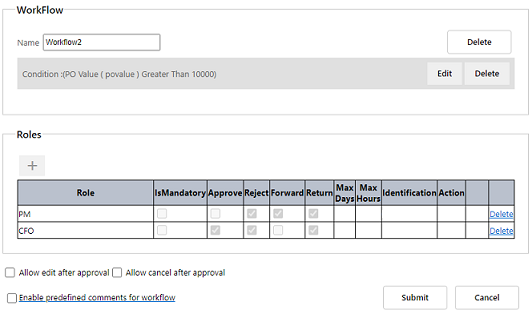
There may be more than one user in each role. For example, there may be many managers, project managers, etc in an organization. When data is sent to a role for approval, it is sent to all users who have the same role. For example, if an approval request is sent to PM, then all users who are PMs will receive the request. Instead, the data should be sent only to a particular user in that role-based. For example, a leave application may need to be sent only to the manager of the branch to which the employee is attached. Then use the identifier “Custom” in the workflow.
Custom Workflow
Create an application variable called m_workflow.
Define the field m_workflow in your tstruct and provide the query as per your business requirement in the expression set. The mode of entry is calculate.
Define a field to obtain “reporting to” person details, Mode of entry is accept.
Define a field called viewfilter through this field you are going to filter the accessibility in the list view level itself.The mode of entry is calculate.
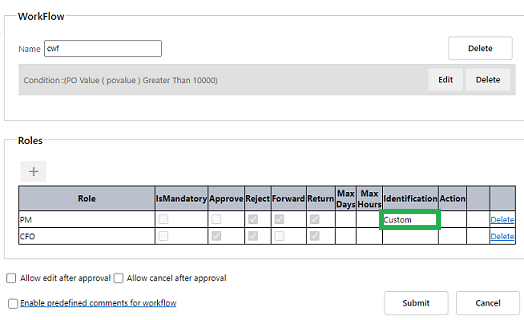
The exact user’s name may be got using an SQL statement. The role that is selected in the workflow level will be available in the role variable. This may be used as a parameter in the SQL. The SQL to be used to get the user’s name should be assigned to the variable named ”’m_workflow”’. This can be done in a script that is set in “On approve” or “On reject” or “On form load” event. Additionally, the status of the transaction in the prior level will be available in the ”wf_status” variable.
The wf_status will contain the following values:
- Approved -Final approval
- Created
- Rejected
- Review
- Approve – when approved in prior level.
- Return
Set the next level of approval to wf_applevel variable in script to override the flow. Whatever level is set in this variable will be used as the next approval level.


