Axpert 11
TStructs (Forms)
- Create Form
- Create DC
- Create Fields
- Grid DC/frames
- Formulae in fields
- SQL in fields
- Drop down fields
- Autogenerate fields
- Table fields
- File upload fields in forms
- Photos &Image fields
- Barcode /QR Code Scanner
- Fill Grid
- Posting data – Gen maps
- Updating fields in DB tables – MD Map
- Toolbars in tstructs
- Tracking changes/Audit trial
- Try it yourself
IViews
Scripts
Axpert Jobs
Axpert Cards
HTML Plug-ins
Users & Roles
- Users, roles & responsibilities
- Responsibilities
- User Role
- User Login
- SSO Authentication
- Stay Sign In
Workflow
Axpert API
Application Var/Params
Publish Axpert Apps
Axpert Mobile
Settings
- Axpert installation
- Change password
- Forgot Password
- Developer Options
- Global Settings
- In-Memory DB
- Notifications for Long Running Webservice’s
- Axpert Configuration on web
- Axpert Licensing
Utilities
Customization
- Main Page Customization
- Home Page Customization
- More API
- Custom User Interface
For Reports - Custom HTML In Forms
- CSS And JS Customization
- Developer Notes
- Hooks In Forms
- Third Party SSO Integration
WebServices
Axfast
SSO Authentication
SSO authentications are inbuilt in the AxpertWeb with followings such as OKTA, Office365, Google Account & FaceBook. Users can choose multiple SSO Authentications based on requirements.
Configurations:
- Should be registered Client ID from each SSO in their developer sites examples given individually.
- Should be enabled below keys in web.config file in the webcode.
- ssologin : okta,office365,google,facebook
- Ex:
<add key="ssologin" value="okta,office365,google,facebook"/>
- Ex:
- ssoclientKey : oktaClientiId,office365ClientId,googleClientId,facebookClientID
- Ex:
<add key="ssoclientKey" value="0oacsbt8oZl24CEmQ4x6,bfff8cad-3c1c-4c14-9499-2423c724f3b7,493358977849-so1sc0tcs9gqrh4jiuaqs36jr9cns0cv.apps.googleusercontent.com,252601612604428"/>
- Ex:
- ssoclientsecretKey : Client Secret Id have the google and facebook only and below is the example.
- Ex:
<add key="ssoclientsecretKey" value=",,ChzG0QxESuMZkQ--mStkSj9z,2bdba09e6ba0e2f47225487344153b59"/>
- Ex:
- ssoredirecturl : This is basically redirect URL after SSO authentication
- Ex:
<add key="ssoredirecturl" value="https://example.com/"/>
- Ex:
- ssologin : okta,office365,google,facebook
OKTA
1. Goto https://developer.okta.com/ 2. Create Application
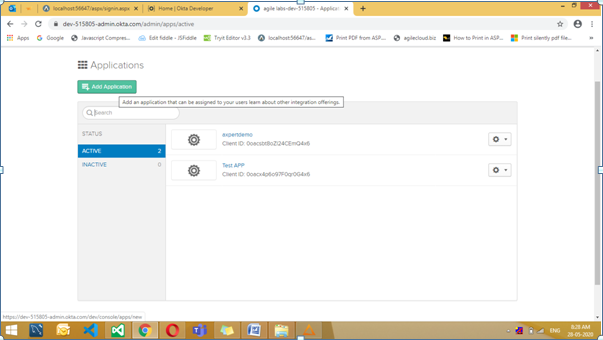
3. Web Application
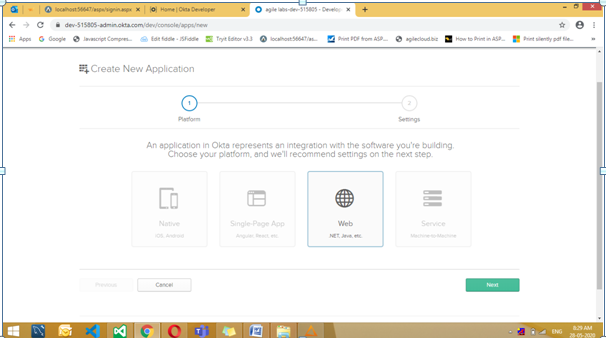
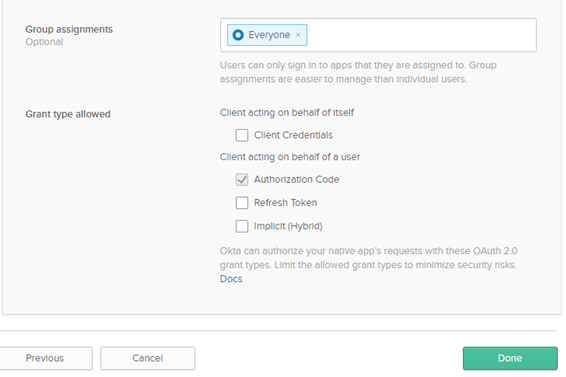
4. Enter application name, Base URL, Login redirect URLs, Logout Redirect URLS
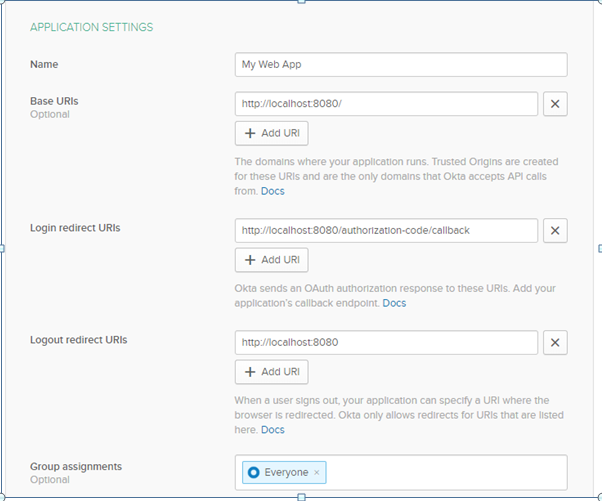
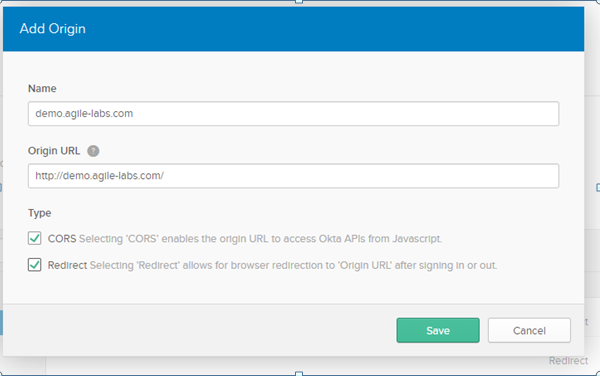
5. API — Trusted Origins
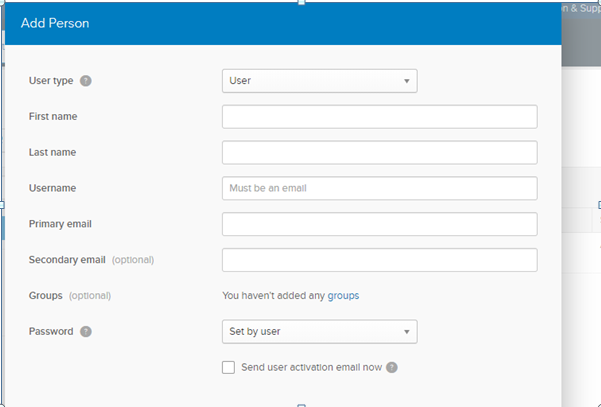
6. Users –> Add Person
7. Copy Client ID and add the same in web.config

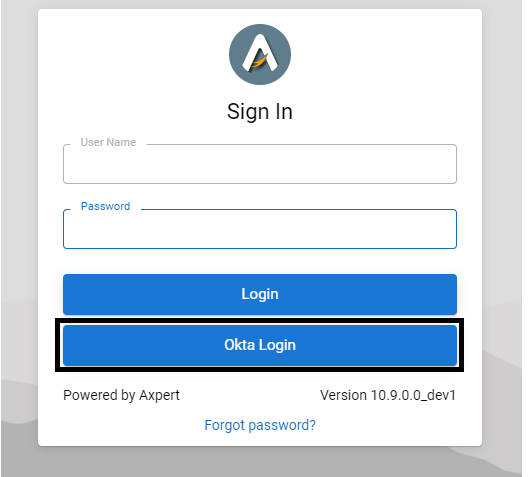
8. OKTA will not give a popup window to enter username & password, so in this case username & password has to enter as normal login. but for other SSO login will show the popup there has to be enter the username and password.
Office365
1. Goto https://portal.azure.com/
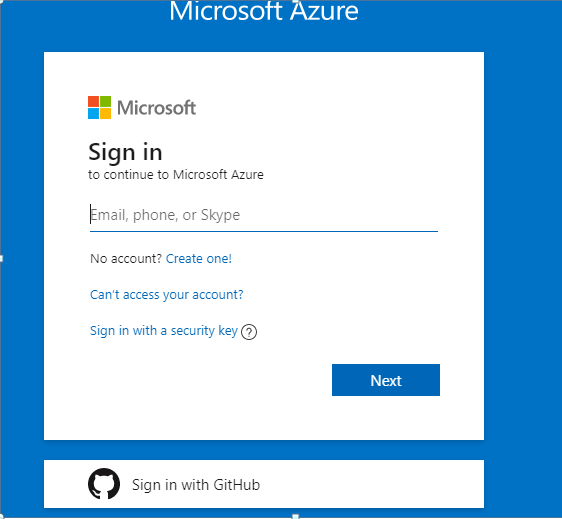
2. Select Azure Active Directory Service.

3. Choose App Registrations –> New Registration
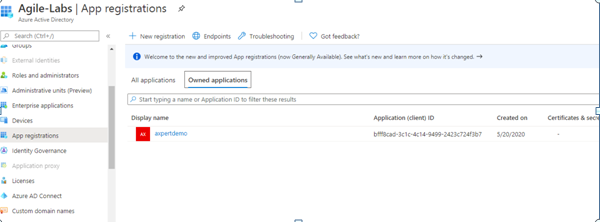
4. Enter application name & Choose Supported Account Type
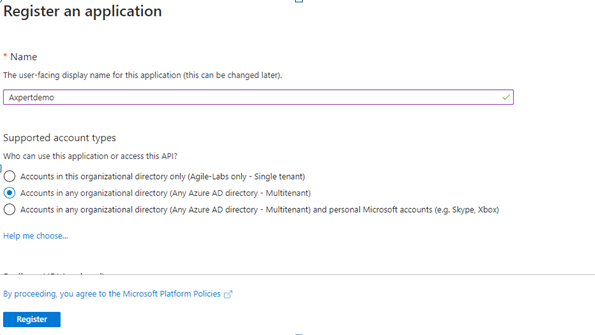
5. Choose redirect URL type as Web & enter the redirect URL

6. Copy Client ID and add in web.config

Google Account
1. Goto https://console.developers.google.com/
2. Login / Signup with Google account
3. Create New project
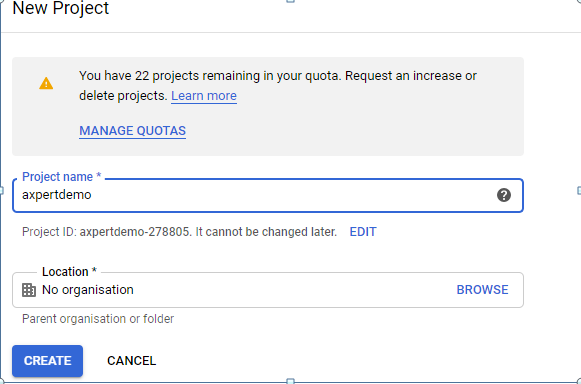
4. Credentials –> Create Credentials
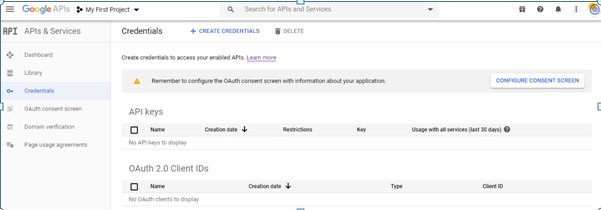
5. Choose OAuth client ID

6. Configure consent screen

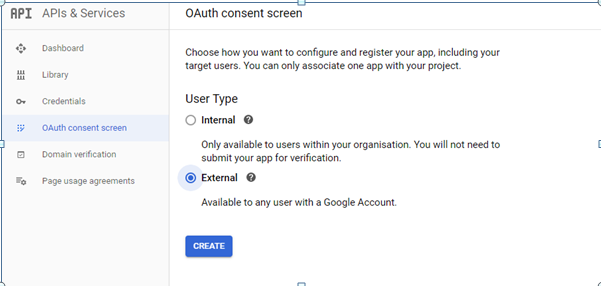
7. Choose Internal / External
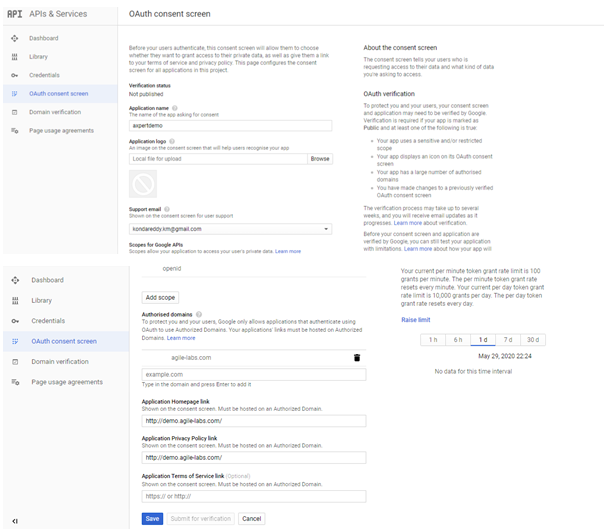
8. Application Name, logo, email, add scope if required more, application home page url and Save
9. Select Credentials — > Create Credentials –> OAuth client ID –> Select Application Type as Web Application
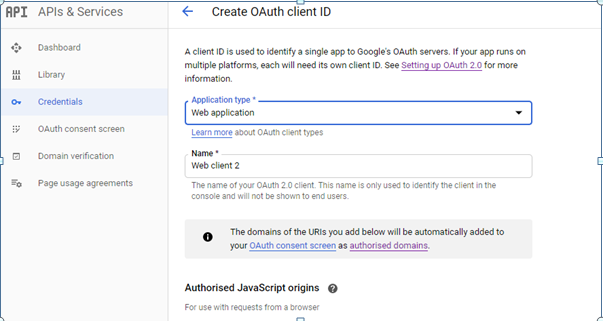
10. Add URIs & Authorised redirect URIs and Save
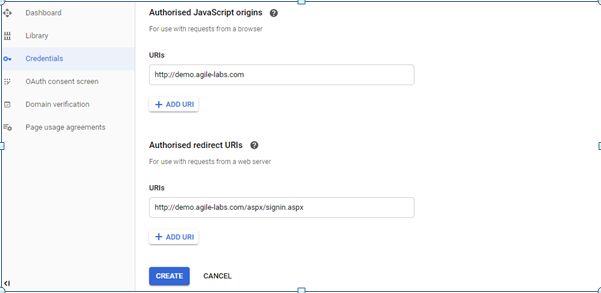
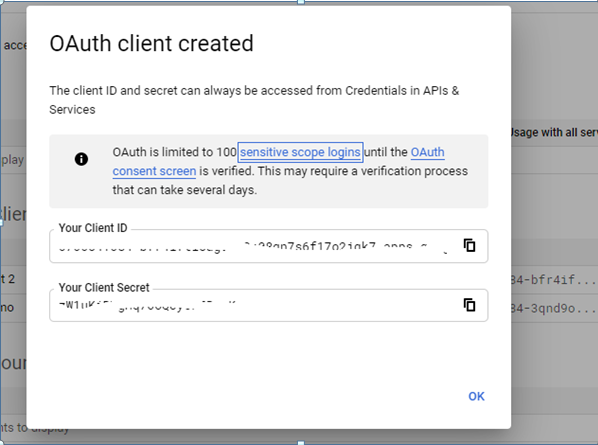
11. add these Client ID and Secret key in web.config
1. Goto https://developers.facebook.com/
2. Login/ SingUp with facebook
3. Create App in My Apps
4. Enter app name, email id and click on create app id

5. Set Up facebook login.
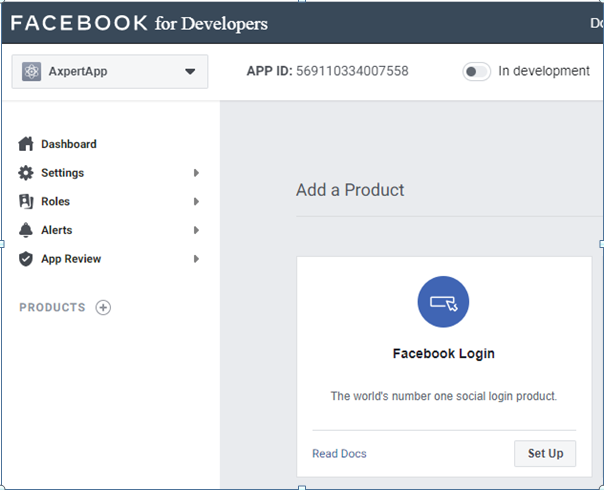
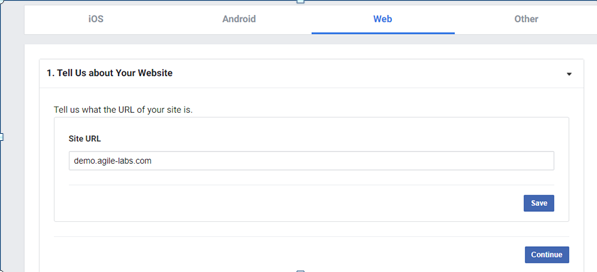
6. Choose WEB and give Site URL and save and continue
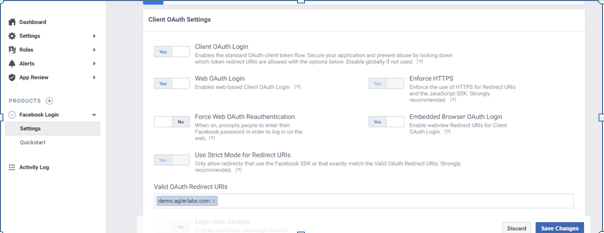
7. FaceBook login settings –> Enable Embedded Browser OAuth Login & give a valid OAuth Redirect URIs and Save Changes.
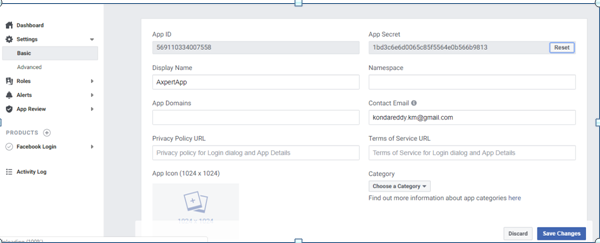
8. Settings –> Basic –> Copy App ID & App Secret keys and add in web.config in the webcode
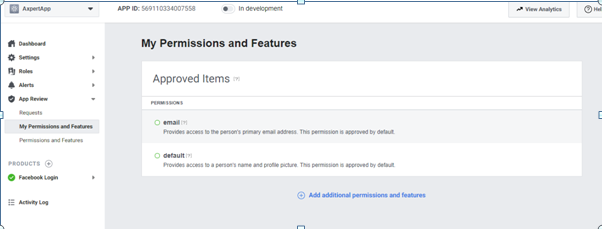
9. My Permissions and Features –> Email & Default — in case the app does not work these permissions should be enabled.
