Axpert 11
TStructs (Forms)
- Create Form
- Create DC
- Create Fields
- Grid DC/frames
- Formulae in fields
- SQL in fields
- Drop down fields
- Autogenerate fields
- Table fields
- File upload fields in forms
- Photos &Image fields
- Barcode /QR Code Scanner
- Fill Grid
- Posting data – Gen maps
- Updating fields in DB tables – MD Map
- Toolbars in tstructs
- Tracking changes/Audit trial
- Try it yourself
IViews
Scripts
Axpert Jobs
Axpert Cards
HTML Plug-ins
Users & Roles
- Users, roles & responsibilities
- Responsibilities
- User Role
- User Login
- SSO Authentication
- Stay Sign In
Workflow
Axpert API
Application Var/Params
Publish Axpert Apps
Axpert Mobile
Settings
- Axpert installation
- Change password
- Forgot Password
- Developer Options
- Global Settings
- In-Memory DB
- Notifications for Long Running Webservice’s
- Axpert Configuration on web
- Axpert Licensing
Utilities
Customization
- Main Page Customization
- Home Page Customization
- More API
- Custom User Interface
For Reports - Custom HTML In Forms
- CSS And JS Customization
- Developer Notes
- Hooks In Forms
- Third Party SSO Integration
WebServices
Axfast
Import Data
The import data option is available under Utilities in the right hand corner of Axpert. Using import, data can be imported into forms in Axpert from Excel or CSV files.
How to Importing Data
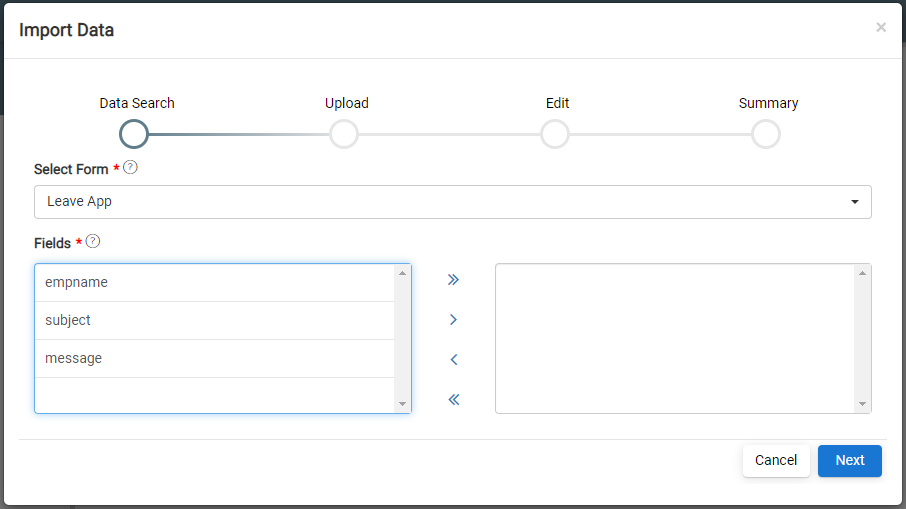
1. click Utilities > Import Data. The import data window appears.

2. Select the form, to which data need to be imported.
3. select the fields to be imported in the imported template.
4. Download the template in Excel or CSV format.

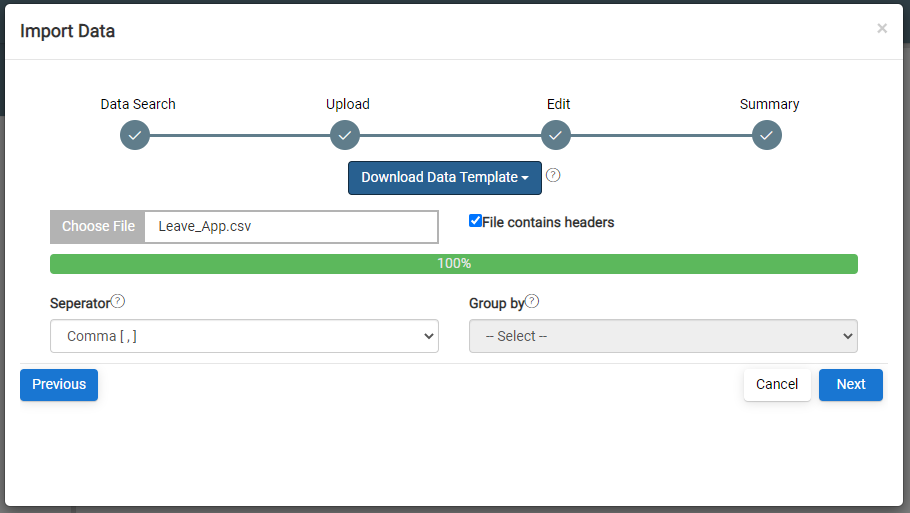
5. Upload the file.
6. check the box File contain header checkbox, if your file is having header.
7. Select the separator if you are importing data using CSV file.
8. In group by, you can select the unique key if you are importing the data in grid frames.
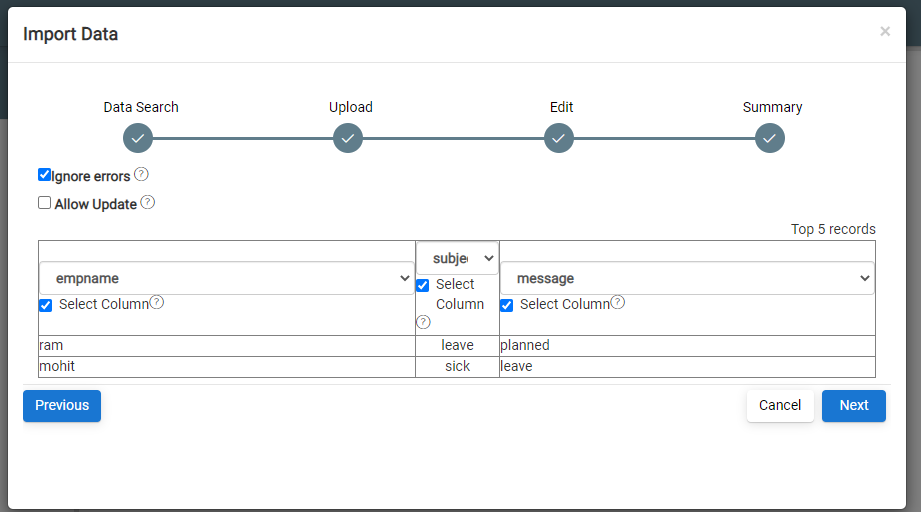
9. click on Next button, it will show you summary page.

10. click Next, data will be imported in the targeted forms.
NOTE: if you are facing any problem in importing data then it will generate summary report.


