Axpert 11
TStructs (Forms)
- Create Form
- Create DC
- Create Fields
- Grid DC/frames
- Formulae in fields
- SQL in fields
- Drop down fields
- Autogenerate fields
- Table fields
- File upload fields in forms
- Photos &Image fields
- Barcode /QR Code Scanner
- Fill Grid
- Posting data – Gen maps
- Updating fields in DB tables – MD Map
- Toolbars in tstructs
- Tracking changes/Audit trial
- Try it yourself
IViews
Scripts
Axpert Jobs
Axpert Cards
HTML Plug-ins
Users & Roles
- Users, roles & responsibilities
- Responsibilities
- User Role
- User Login
- SSO Authentication
- Stay Sign In
Workflow
Axpert API
Application Var/Params
Publish Axpert Apps
Axpert Mobile
Settings
- Axpert installation
- Change password
- Forgot Password
- Developer Options
- Global Settings
- In-Memory DB
- Notifications for Long Running Webservice’s
- Axpert Configuration on web
- Axpert Licensing
Utilities
Customization
- Main Page Customization
- Home Page Customization
- More API
- Custom User Interface
For Reports - Custom HTML In Forms
- CSS And JS Customization
- Developer Notes
- Hooks In Forms
- Third Party SSO Integration
WebServices
Axfast
Axpert on-premise installation
Connect with the Agile Labs support team to get it installed in the local instance. You can use the Contact Us link in the www.agilecloud.biz to send a request for on-premise installation.
Axpert installation
Download the latest Axpert version from the website.
Create two folders AxpertWeb, AxpertDeveloper, in one of the drives on the system to have axpert. Select the path of these folders while installing.
Click on Axpert Dev.exe and run as administrator. Select the path to install Axpert.

Click on I agree and click on Next. Installation begins.

After successful installation of the developer, install Axpert Web.
Click on Axpert web.exe and run as administrator. Select the path to install axpert.

Select both Redis and IIS and click on Install

NOTE: To check if redis is configured on the system. Go to command prompt on windows, run as administrator and use the command as show below
redis-cli
If redis is configured then the server ip with the port number is displayed as shown in the image.

The installation begins

Wait for the successful installation message on the screen.
After successful installation of Axpert Web and Developer, go to Axpert Web folder and find .lic file.
Configuration
In Axpert Web find the web.config file and enable login trace by changing the value to “true”

Connect to Axpert Application
In Axpert web folder open the axpert application and run it as administrator, an initialization wizard opens as shown
Click on connect to Axpert application.
Select the database from the dropdown.

Enter appropriate details in the host string, schema name and password. Click on Go after entering valid credentials.

The Axpert login page appears. Enter valid credentials and click on Sign in.

A License page appears as shown below

Select Partner License, enter the user name. organization name and license key. Click on Activate.
Create a connection by clicking on the connect icon on the right of the project drop-down field.

A pop-up appears on the successful establishment of the connection.

Click on OK.
Click on Apply. A pop-up appears, enter the new connection name and click on OK.
Now login with the connection that has been created. Enter valid credentials and Sign in to the desktop application. The desktop view of Axpert application appears.
IIS Configuration
Open IIS on your system and run as administrator.
Click on Sites-> Axpert Developer->Right click on axpert developer-> Manage Application-> Browse

Once the localhost web page opens up, Enter the credentials to login

The Axpert run site application opens up.

Now, Go to the Axpert Web folder. In the Axpert Web folder, find web.config file. Right-click and edit the file using Notepad or Notepad++.
Insert the appropriate path to the developer site as the example shown below and save the changes. The path may vary based on users.

Next, Go to Axpert Developer folder. In the Axpert developer folder, edit the web.config file. Set the mode “Off” and save the file
![]()
Try, reloading the developer page from the run site.
The login page of the developer site will appear. Login with valid credentials and proceed with development.

How to apply Patch on Axpert?
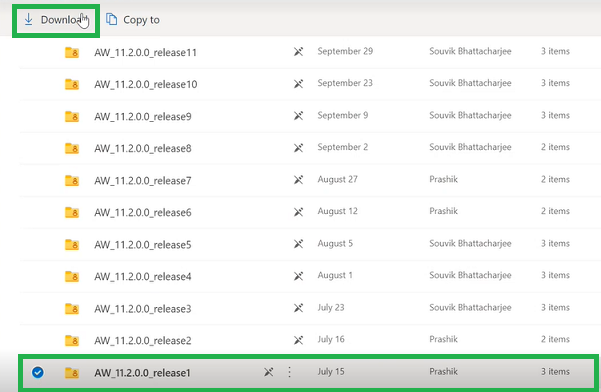
Open the sharepoint link provided by the team to download the latest patch OR Download the latest patch from our website
NOTE
- Stop the IIS before you begin the patch application.
- If the application is not recently updated with the latest patches then, the patch application should begin from release 1.
For example, System A has Axpert 11.2 version. If you need to update this application with respect to the latest release, then you need to manually apply the patches from AW_11.2_release01 to AW_11.2_release xx.
Extract the patch release file. In the extracted files go to AW_11. X.0.0_releaseX folder. Copy all the contents in AW_11. X.0.0_releaseX folder to Axpert Web folder.

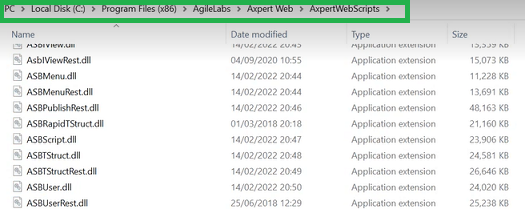
Copy the required ASB’s from the SharePoint link as mentioned in the release notes (email sent across the org)

Replace these files in Axpertwebscripts folder
Open Axpert structures, and open the script file

Open the backend database application simultaneously (For Ex: DBeaver, Toad etc), connect to your schema. Open SQL editor.
NOTE:For n number of schemas in your local, run the script n times respectively.
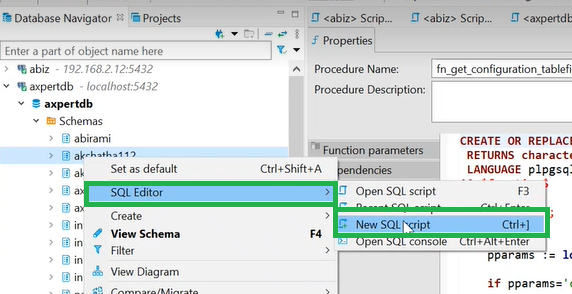
Paste the script and click on run.
On successful completion go to Axpert Developer folder and copy the path as shown

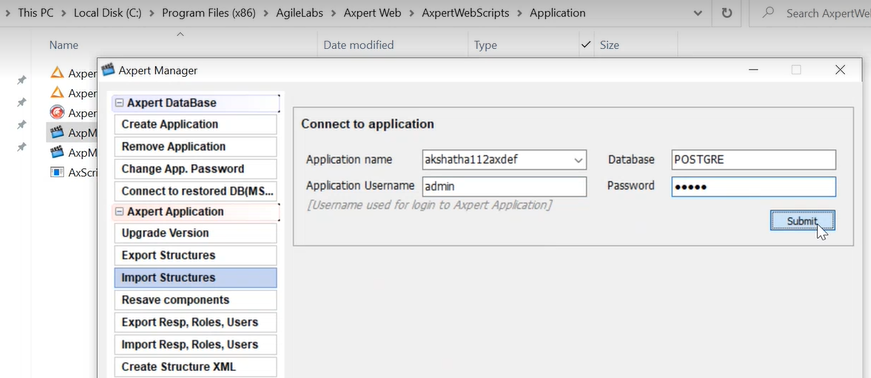
Go to Axpert Webscripts and open Axpmanger, and connect to the application using axdef login.
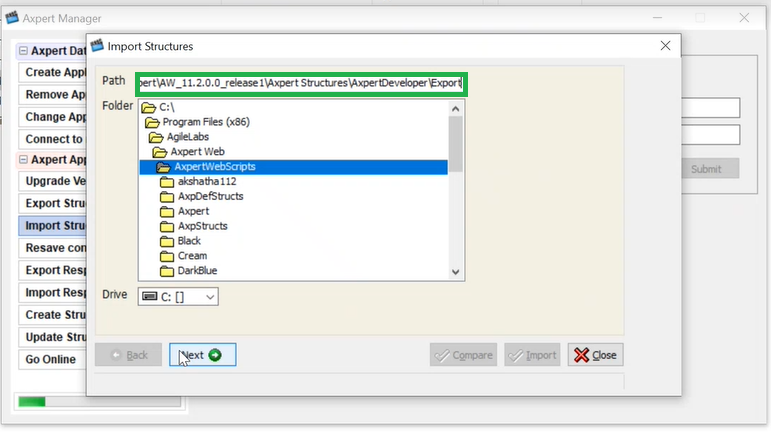
A Pop up appears, Paste the copied path and click on Next
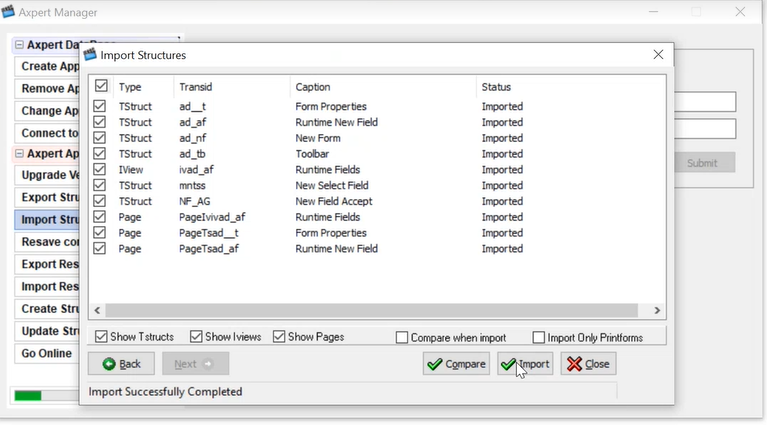
Select all structures and click on import. On successful import, the status of all structures will display as “imported”. If any one or all of the status are not imported then, you need to import the files again until they are imported successfully.
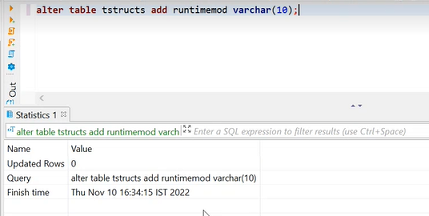
Now, go to Axpert Developer folder and open the script file.
Copy the script and execute the queries individually to avoid any undetermined errors during execution.

On execution of the entire script, the patch application is completed.
Clear the Redis Start the IIS and log in to the application.
Follow these steps to update with the latest releases.
Go Online Utility in Axpert Manager
Goonline utility is used to convert a desktop Tstruct to web compatible Tstruct.
Steps to Use Go online:
In Application variables/Params Set a variable – AxpDbDirPath with
Default value — \\192.xx.xx.xx\abc-foldername\AxImportDbDir\appshare .
Note: This path varies for all users. Enter your folder path and proceed.
- Create a Tstruct in the desktop application and related fields in the dc.
- Check the run site for the presence of the recently created tstruct.
- Verify the presence of the Tstruct in the dev site. It will not be present on the developer site as shown below.
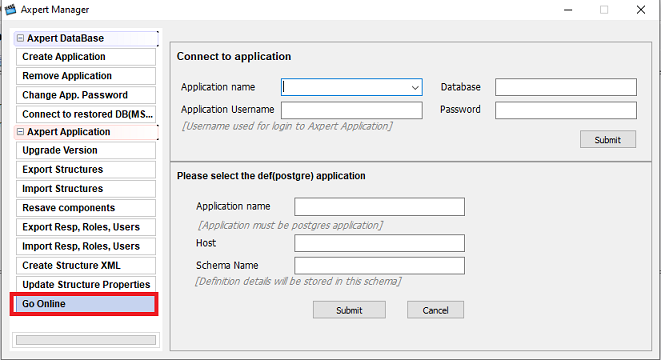
- Go to Axpert Manager and find the Go online utility. Fill in the credentials and click on submit.
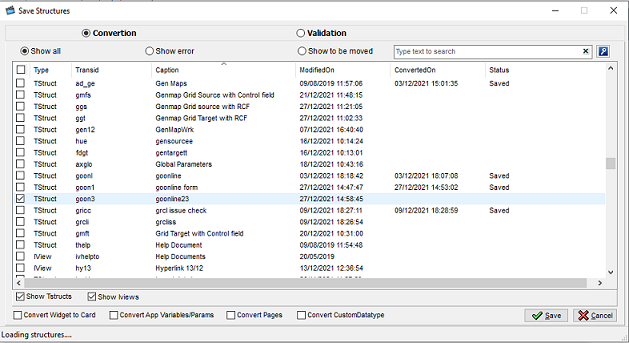
- Select the Tstruct that needs to be converted and click on Save.
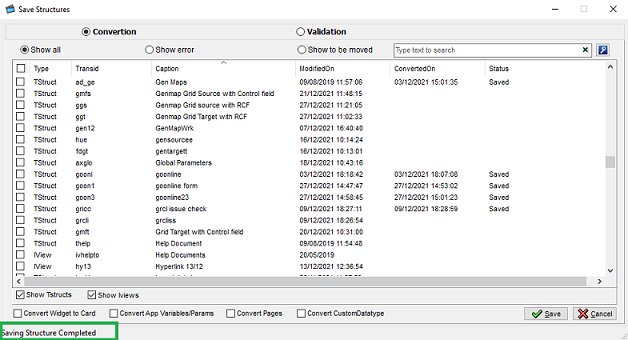
- On successful completion a message “Saving structure completed” appears confirming the conversion.
- After conversion, find the converted tstruct in the dev site as shown.

The Tstruct will be accessible only on the run site.

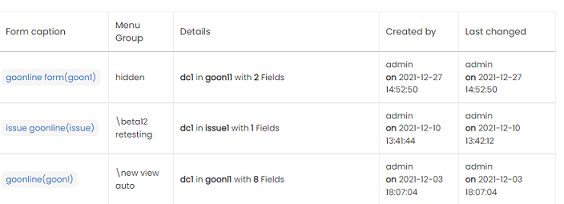
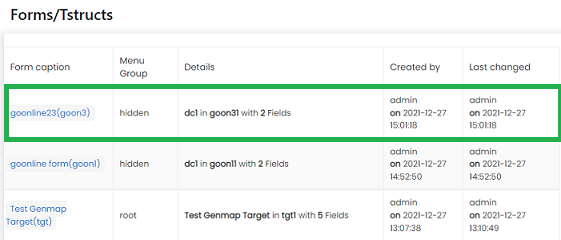
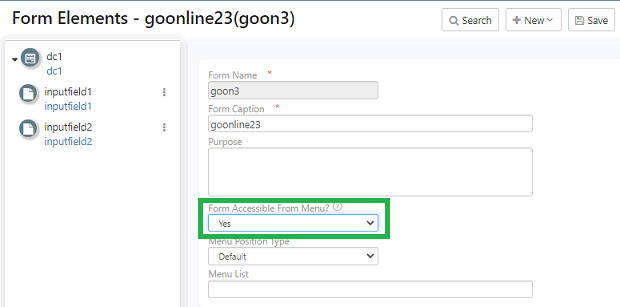
By default, the tstruct’s menu group will be hidden. To change the menu group type use the “Form accessible from menu option” from the form properties.
